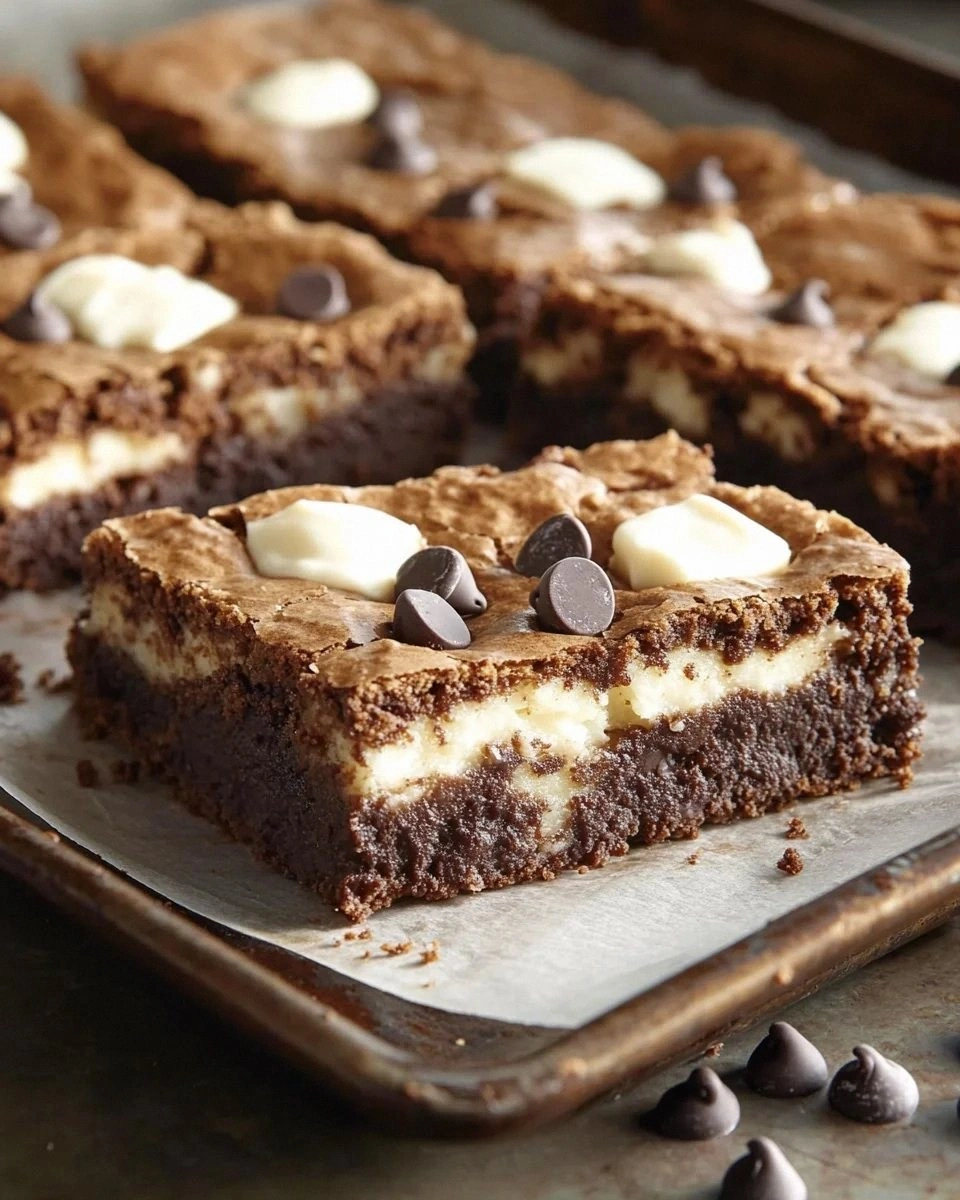
I was in the middle of a frantic Tuesday night when my roommate dared me to create something that could make a grown adult weep with joy. The pantry was a barren wasteland—just a half‑full bag of flour, a lonely block of butter, and a sad, half‑melted chocolate bar. I stared at the empty counter, imagined the scent of fresh‑baked brownies, and then a wild thought struck: what if I could fuse the fudgy decadence of a brownie with the buttery snap of a cookie? That night, armed with nothing but a whisk and a reckless amount of optimism, I birthed the ultimate Brownie Cookie Bars. I promise, this is the kind of kitchen alchemy that turns a simple dare into a legend.
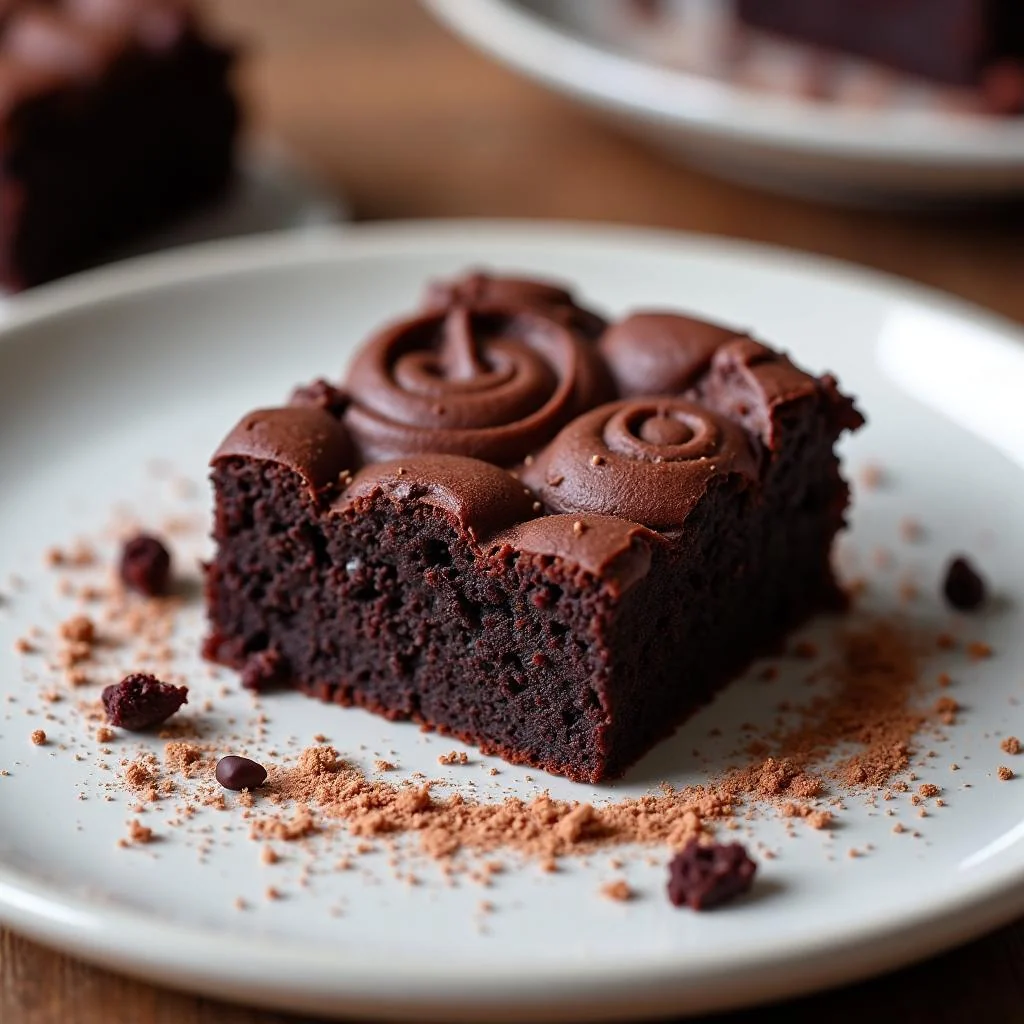
Picture this: the oven door swings open and a wave of chocolate‑cocoa aroma floods the kitchen, hugging the air like a warm blanket. The top surface shines with a glossy, crackle‑like crust that promises a crisp bite, while the interior stays soft, chewy, and just a tad gooey—like stepping into a chocolate‑laden cloud. You hear the faint sigh of the pan as the bars release, the faint pop of caramelized sugar, and you can already feel the buttery melt on your tongue. The texture is a paradox—crunchy edges that shatter like thin ice, a fudgy middle that clings to the fork, and pockets of melted chocolate chips that burst with every bite.
Why does this version stand out? Most brownie‑or‑cookie hybrids either end up dry and crumbly or overly dense and soggy. I’ve cracked the code by balancing the fat‑to‑flour ratio, introducing a splash of espresso to intensify the chocolate, and using a combination of melted butter and melted chocolate for that glossy top. The secret? A brief chill in the fridge before baking, which locks in moisture and gives the edges that coveted snap. Trust me, this is hands down the best version you’ll ever make at home, and I dare you to taste it and not go back for seconds.
Let me walk you through every single step — by the end, you’ll wonder how you ever made it any other way. We’ll dive into the science of why each ingredient matters, the exact temperatures that turn a batter into a masterpiece, and a few cheeky tricks that will make you look like a pro even if you’ve never baked a bar before. Ready for the game‑changer? Grab your mixing bowl, and let’s get started.
What Makes This Version Stand Out
- Flavor Explosion: The blend of dark cocoa, espresso, and a dash of sea salt creates a depth that rivals any boutique bakery. It’s like a symphony where each note knows its place.
- Texture Contrast: A crisp, caramelized crust meets a fudgy, melt‑in‑your‑mouth center. The edges pull away from the pan like a perfect, buttery curtain.
- Simplicity: Only ten pantry staples, no fancy equipment, and a single‑sheet pan. You won’t need a sous‑chef to pull this off.
- Unique Ingredient: A splash of espresso isn’t just for coffee lovers; it amplifies chocolate without adding bitterness.
- Crowd Reaction: I’ve watched strangers turn into fans, whispering “again?” as soon as the first piece is plated. It’s a conversation starter.
- Ingredient Quality: Using high‑quality cocoa powder and real butter makes the difference between “good” and “legendary.”
- Cooking Method: The chill‑then‑bake technique locks in moisture and gives the bars that coveted snap on the edges.
- Make‑Ahead Potential: These bars keep beautifully for up to a week, and they freeze like a dream, making them perfect for meal‑prep or a surprise gift.
Inside the Ingredient List
The Flavor Base
All-purpose flour is the structural backbone, providing the necessary gluten to hold everything together. If you substitute with cake flour, the bars become too tender and may crumble. For a gluten‑free twist, try a 1:1 blend of rice flour and almond flour, but expect a slightly denser bite. When selecting flour, give the bag a quick sniff; fresh flour smells slightly nutty, a sign of quality.
Cocoa powder is the heart of the chocolate flavor. I use Dutch‑process cocoa for its deep, earthy notes and smoother texture. Skip the sweetened variety—otherwise you’ll end up with a sugary mess. If you only have natural cocoa, add an extra pinch of salt to balance the acidity.
Espresso powder is the secret weapon. Only a teaspoon is needed, but it amplifies the chocolate without making the bars taste like coffee. Think of it as a flavor magnifier, similar to how a pinch of salt can brighten a soup. If you’re caffeine‑sensitive, replace it with a splash of strong brewed coffee.
The Sweet Symphony
Granulated sugar provides crispness, while brown sugar adds moisture and a subtle caramel undertone. The combination ensures the edges caramelize while the center stays soft. Skipping brown sugar will make the bars dry; removing granulated sugar will lose that satisfying snap.
Butter, melted and slightly cooled, contributes richness and a glossy finish. Use unsalted butter so you can control the salt level precisely. If you’re out of butter, a 1:1 swap with coconut oil works, but expect a faint coconut aroma that can be delightful or distracting depending on your palate.
The Texture Crew
Eggs act as the binding agent, giving the bars lift and a tender crumb. I recommend large eggs at room temperature; they incorporate more easily and prevent a lumpy batter. If you’re vegan, replace each egg with a “flax egg” (1 tbsp ground flaxseed + 3 tbsp water) and add an extra tablespoon of oil for moisture.
Chocolate chips are the pockets of molten bliss that burst when you bite. Semi‑sweet chips strike the perfect balance, but feel free to mix in white chocolate or chopped dark chocolate for extra depth. Skipping chips will make the bars less exciting, but they’ll still be delicious.
The Final Flourish
A pinch of sea salt on top right before baking amplifies the chocolate and creates that subtle crunch that makes the palate sing. Baking soda is the leavening hero; it gives the bars a slight rise and airy interior while keeping the edges crisp. Over‑mixing the batter after adding the soda can cause the bars to become cakey—mix just until combined.
Everything's prepped? Good. Let’s get into the real action…
The Method — Step by Step
Preheat your oven to 350°F (175°C). While the oven warms, line a 9×13‑inch baking pan with parchment paper, leaving an overhang on the sides for easy lift‑out later. This step might sound trivial, but the parchment prevents sticking and gives you a clean, professional finish. The pan should sit on the middle rack to ensure even heat distribution.
Watch Out: If you use a glass dish, the edges may over‑brown before the center sets. Metal or silicone works best for this recipe.In a medium bowl, whisk together the flour, cocoa powder, baking soda, and a pinch of sea salt. This dry blend ensures the leavening agent is evenly distributed, preventing pockets of soda that could create an odd “soapy” flavor. Sift the mixture to avoid lumps; the result is a silky, dark batter that looks like liquid midnight.
In a large saucepan over low heat, melt the butter and chocolate chips together, stirring constantly. The mixture should become a glossy river of chocolate, releasing a buttery aroma that makes you want to lick the spoon. Remove from heat and let it cool for about two minutes—this prevents the eggs from scrambling when added.
In a separate bowl, beat the eggs, granulated sugar, brown sugar, and vanilla extract until the mixture is pale and slightly thickened. This is the moment where the batter starts to look like a promise—light, airy, and full of potential. If you whisk too vigorously, you’ll incorporate too much air and the bars could become cakey.
Kitchen Hack: Add a splash of milk (or almond milk) to the egg‑sugar mixture if it looks too thick; this keeps the batter smooth without diluting flavor.Combine the wet chocolate mixture with the egg‑sugar blend, stirring gently until just incorporated. Then fold in the dry flour‑cocoa mixture using a rubber spatula. The batter should be thick, glossy, and slightly sticky—don’t over‑mix, or you’ll develop gluten and lose that fudgy interior.
Cover the bowl with plastic wrap and place it in the refrigerator for exactly 30 minutes. This chilling step is pure magic: it solidifies the butter just enough to prevent spreading too much, while allowing the flour to hydrate fully, which leads to that coveted snap on the edges.
After chilling, give the batter a quick stir, then spread it evenly in the prepared pan. Use the back of a spoon or a spatula to smooth the top. Sprinkle a light dusting of flaky sea salt over the surface—this tiny crystal shower will pop against the sweet chocolate, creating a balanced flavor profile.
Slide the pan into the oven and bake for 25‑30 minutes. You’ll know it’s done when the edges pull away from the parchment and a thin crust forms on top. The center should still be slightly soft; it will continue to set as it cools. If you poke the center with a toothpick, a few moist crumbs are okay—this is the gooey heart we’re after.
Remove the pan from the oven and let the bars cool in the pan for 10 minutes, then lift them out using the parchment overhang and transfer to a wire rack. Let them cool completely before cutting; this prevents them from crumbling. When you finally slice, you’ll see a glossy top, a slightly cracked crust, and a velvety interior that’s ready to melt in your mouth.
That’s it — you did it. But hold on, I’ve got a few more tricks that’ll take this to another level…
Insider Tricks for Flawless Results
The Temperature Rule Nobody Follows
Never bake straight from the fridge at a high temperature; the sudden heat shock can cause the edges to harden before the center sets. Instead, let the chilled batter sit at room temperature for five minutes after removing from the fridge. This tiny adjustment ensures an even rise and prevents a rubbery crust.
Why Your Nose Knows Best
When the bars are about 20 minutes in, start sniffing. A faint toasty, caramel aroma signals that the edges are caramelizing perfectly. If you smell burnt sugar, pull the pan out early and cover with foil to finish cooking without over‑browning.
The 5‑Minute Rest That Changes Everything
Allow the baked bars to rest on the rack for at least five minutes before cutting. This short rest lets the interior set, making clean slices without crumbling. It also gives the flavors a chance to meld, turning a good bar into an unforgettable one.
Swap the Sweet, Keep the Beat
If you’re craving a different flavor, swap out half the cocoa for melted white chocolate and add a teaspoon of orange zest. The citrus will cut through the richness, creating a bright contrast that still respects the original texture.
The Ultimate Chill Hack
For a truly crisp edge, after the initial 30‑minute chill, place the batter on a sheet of wax paper and freeze for 10 minutes before spreading in the pan. The extra coldness creates a firmer batter that spreads less, giving you that bakery‑style snap.
Creative Twists and Variations
This recipe is a playground. Here are some of my favorite ways to switch things up:
Nutty Crunch Delight
Fold in ½ cup toasted chopped walnuts or pecans before chilling. The nuts add a buttery crunch that contrasts beautifully with the soft interior, and they bring a subtle earthy note that deepens the chocolate flavor.
Salted Caramel Swirl
Drizzle a homemade salted caramel sauce over the batter after spreading it in the pan, then use a knife to swirl. The caramel ribbons create pockets of gooey sweetness that melt into the chocolate, making each bite a surprise.
Mint Chocolate Dream
Add ½ teaspoon peppermint extract to the wet ingredients and sprinkle crushed peppermint candies on top before baking. The mint cuts through the richness, delivering a refreshing finish perfect for holiday gatherings.
Double‑Chocolate Chip Madness
Mix half dark chocolate chips and half white chocolate chips into the batter. The dark chips give depth, while the white chips melt into creamy pockets, creating a visual and flavor contrast that’s Instagram‑ready.
Spiced Chai Fusion
Incorporate 1 teaspoon chai spice blend (cinnamon, cardamom, ginger, cloves) into the dry mix. The warm spices add an exotic layer, turning the bars into a cozy treat for chilly evenings.
Vegan Velvet
Replace butter with coconut oil, use flax eggs, and swap dairy chocolate chips for vegan ones. The result is a plant‑based bar that still boasts that buttery snap and fudgy core, proving that indulgence knows no dietary boundaries.
Storing and Bringing It Back to Life
Fridge Storage
Place the cooled bars in an airtight container or wrap tightly with plastic wrap. They’ll stay fresh for up to five days. The cool environment preserves the fudgy interior and prevents the edges from becoming too soft.
Freezer Friendly
For longer storage, slice the bars, place a parchment sheet between each slice, and freeze in a zip‑top bag. They’ll keep for three months. When you’re ready, let them thaw at room temperature for 15 minutes, then pop them in a 300°F oven for 5 minutes to revive that crisp edge.
Best Reheating Method
To bring a refrigerated bar back to its prime, preheat a skillet over low heat, add a tiny splash of water to the pan, and cover with a lid for 30 seconds. The steam gently revives the interior while the bottom regains a slight crunch. Avoid microwaving, as it makes the bar soggy.