I was in the middle of a midnight snack raid when my roommate dared me to make a cheesecake that wouldn’t make my blood sugar spike. I laughed, grabbed the nearest low‑fat cottage cheese, and set a timer for a “quick fix.” What happened next was a kitchen catastrophe turned culinary epiphany: a dense, grainy mess that tasted like a dairy disaster. I swear I heard the batter sigh in defeat. That night I vowed to reinvent the classic cheesecake, stripping away sugar and heavy cream while preserving that melt‑in‑your‑mouth decadence. This promise became the birth of a dessert that feels like cheating on a diet, but is actually a clean‑eating triumph.
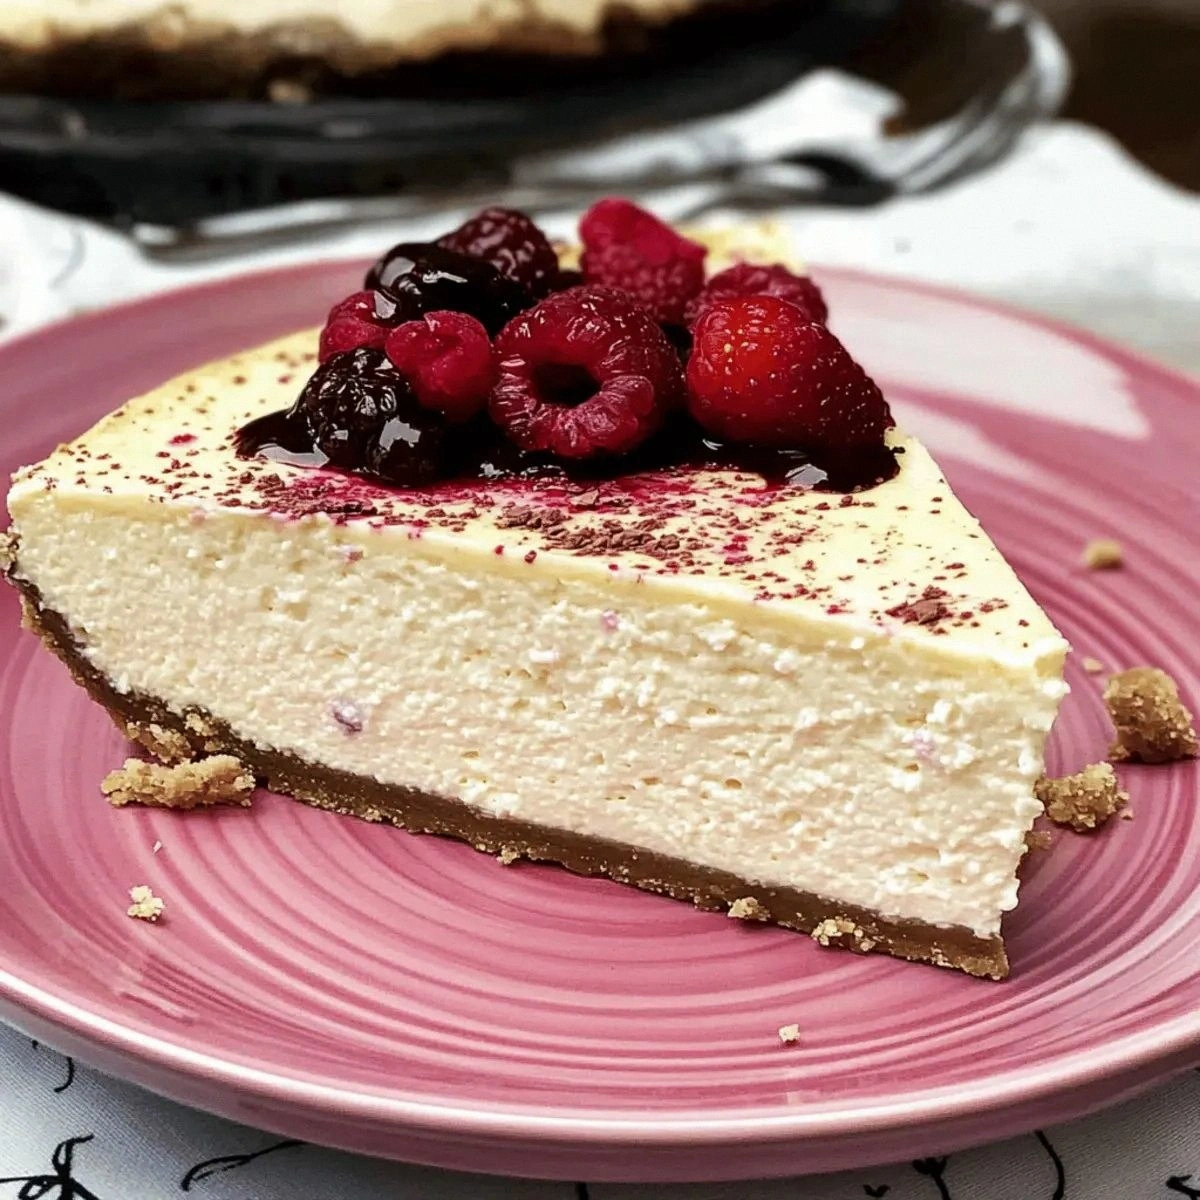
Picture this: the oven humming like a contented cat, the aroma of vanilla and toasted almond drifting through the air, and a buttery crust that cracks just enough to give a satisfying snap when you tap it. Your eyes are drawn to the glossy top, a pale ivory that glistens like fresh snow under a kitchen light. You hear the faint pop of the edges pulling away from the pan—a sound that says, “I’m done, and I’m proud of it.” When you finally slice into it, the texture is silkier than a satin sheet, and the flavor is a gentle dance of tangy cheese and sweet‑free comfort. That moment, my friend, is pure, guilt‑free bliss.
Most cheesecake recipes either drown you in sugar or force you to wrestle with a confusing list of sugar substitutes that taste like cardboard. I’ve tried them all: Splenda, erythritol, monk fruit, you name it, and they either leave a bitter aftertaste or turn the batter into a gritty paste. This version, however, leans on the natural creaminess of low‑fat cottage cheese and the subtle richness of almond flour. The result is a cheesecake that’s light enough to eat for breakfast but indulgent enough to serve at a dinner party. I dare you to taste this and not go back for seconds; it’s that good.
And now, the secret weapon: a splash of unsalted butter melted into the crust, combined with almond flour, creates a nutty, buttery base that’s both gluten‑free and low‑carb. It’s a technique most recipes overlook, opting for traditional graham crackers that sabotage the health factor. This simple switch adds a depth of flavor that feels like a hug from the inside. Let me walk you through every single step — by the end, you’ll wonder how you ever made it any other way.
What Makes This Version Stand Out
- Taste: The natural tang of cottage cheese pairs perfectly with a whisper of vanilla, delivering a flavor profile that’s both familiar and fresh. No artificial sweeteners, no aftertaste.
- Texture: Creamy, dense, yet airy—thanks to the whipped eggs and sour cream, the crumb is as smooth as a runway model’s skin.
- Simplicity: Only six core ingredients, all pantry‑friendly, and no fancy equipment beyond a springform pan.
- Uniqueness: Almond flour in the crust gives a nutty undertone that most sugar‑free cheesecakes miss, turning the base into a star, not a sidekick.
- Crowd Reaction: Guests often ask, “Is this really sugar‑free?” and then immediately ask for seconds, proving the power of a well‑balanced dessert.
- Ingredient Quality: Low‑fat cottage cheese provides protein without the heaviness of full‑fat cream cheese, keeping the calorie count honest.
- Cooking Method: A gentle water‑bath bake prevents cracks and ensures even cooking, a trick most shortcuts skip.
- Make‑Ahead Potential: This cheesecake keeps its shape and flavor for up to three days in the fridge, making it perfect for meal‑prep or party planning.
Inside the Ingredient List
The Flavor Base
Low‑fat cottage cheese is the hero here. Its mild tang gives the cheesecake that signature “cheesecake” flavor without the excess fat of traditional cream cheese. If you skip it, you’ll end up with a bland, watery mess that lacks structure. I recommend choosing a brand with a creamy consistency; you can even feel the difference by pressing a spoonful between your fingers—there should be a slight resistance, not a watery slide. A good swap, if you’re allergic to dairy, is a blend of silken tofu and Greek yogurt, but expect a subtle shift in flavor.
The Texture Crew
Sour cream adds a luxurious richness while keeping the carbs low. It also stabilizes the batter, preventing it from curdling during the bake. If you replace it with Greek yogurt, you’ll get a slightly tangier note and a firmer set, which some people love. The three large eggs act as the binding agent, creating that airy lift that makes the cake rise just enough to avoid a dense brick. Over‑beating the eggs can incorporate too much air, leading to cracks; a gentle whisk is all you need.
The Unexpected Star
Almond flour is the secret behind the crust’s nutty aroma and gluten‑free status. It absorbs butter beautifully, forming a crumbly yet sturdy base that holds up to the weight of the filling. If you’re not a fan of almonds, you can substitute with finely ground hazelnuts or even coconut flour, but you’ll need to adjust the butter ratio—coconut flour is more absorbent.
The Final Flourish
A teaspoon of vanilla extract might seem modest, but it amplifies every other flavor, acting like a conductor guiding the orchestra. Unsalted butter, melted and folded into the crust, adds a glossy finish and a buttery crunch that contrasts beautifully with the silky filling. If you’re watching cholesterol, try a plant‑based butter substitute; just be sure it’s solid at room temperature to maintain the crust’s integrity.
Everything's prepped? Good. Let's get into the real action…
The Method — Step by Step
- Preheat and Prepare: Preheat your oven to 325°F (165°C). Place a large roasting pan on the lower rack and fill it halfway with hot water to create a gentle water bath. This steam environment is the secret that prevents cracks and keeps the cheesecake moist. While the oven warms, lightly grease the bottom of a 9‑inch springform pan with a dab of butter, then line the base with parchment paper for easy release. Kitchen Hack: If you don’t have a roasting pan, a disposable aluminum tray works just as well for the water bath.
- Make the Crust: In a medium bowl, combine 1 cup almond flour with 2 tablespoons melted unsalted butter. Stir until the mixture resembles wet sand, then press it firmly into the bottom of the springform pan, creating an even layer about ¼‑inch thick. The butter should melt the almond flour just enough to bind, but not so much that it becomes greasy. Bake the crust for 8‑10 minutes, or until it turns a light golden hue and smells nutty. Let it cool while you work on the filling—this step is crucial because a warm crust can melt the filling later.
- Blend the Base: Drain the 2 cups of low‑fat cottage cheese and place it in a food processor. Add 1 cup sour cream, the vanilla extract, and a pinch of salt. Process on high for 30 seconds, then scrape down the sides and blend another 30 seconds until the mixture is completely smooth. Watch Out: Over‑processing can make the mixture too thin, leading to a runny cheesecake. Stop as soon as it’s silky.
- Incorporate the Eggs: Crack the three large eggs into a separate bowl. Lightly whisk them—just enough to break the yolks, not to create a frothy foam. Gently fold the eggs into the cheese mixture, one at a time, using a rubber spatula. This technique prevents too much air from being incorporated, which could cause cracking. You’ll notice the batter thickening instantly, a sign that the structure is forming correctly.
- Combine and Fill: Pour the silky batter over the pre‑baked crust, smoothing the top with the back of a spoon. Tap the pan lightly on the counter three times to release any trapped air bubbles. The surface should be glossy and slightly domed—this is the “perfect” look that tells you the batter is evenly distributed.
- Bake in the Water Bath: Carefully slide the springform pan onto the center rack of the oven, making sure the water in the roasting pan surrounds the cheesecake but does not spill over. Bake for 30‑35 minutes. You’ll know it’s done when the edges are set and the center still has a gentle jiggle—think of a firm gelatin that wobbles just a tad when you shake the pan. Resist the urge to open the oven door early; each peek releases steam and can cause cracks.
- Cool Gradually: Turn off the oven, crack the door open a few inches, and let the cheesecake sit for 15 minutes. This gradual cooling reduces the shock that creates cracks. Afterward, remove the pan from the water bath and place it on a wire rack to cool completely—about an hour. Once at room temperature, chill the cake in the refrigerator for at least 3 hours, preferably overnight. This step is where the flavors meld and the texture firms up.
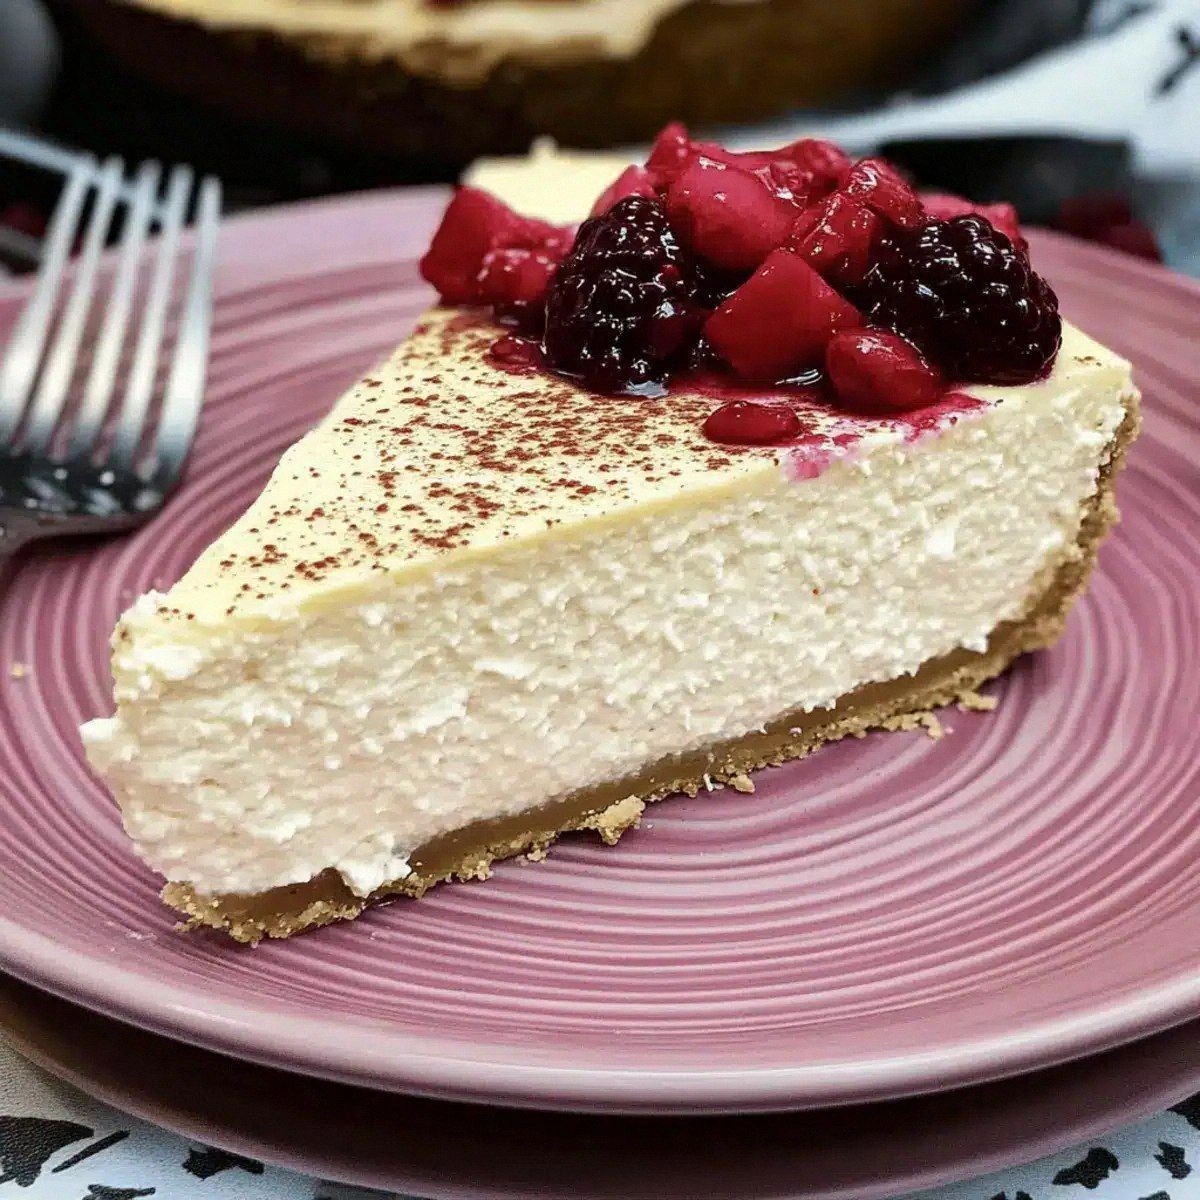
- Release and Serve: Run a thin knife around the edge of the springform pan to loosen the crust, then unlatch the sides. The cheesecake should slide out effortlessly, revealing a pristine, glossy surface. Slice with a hot, wet knife for clean cuts—dip the blade in hot water, wipe dry, and repeat for each slice. Serve plain, or drizzle with a sugar‑free berry coulis if you crave a pop of color. Kitchen Hack: To get ultra‑clean slices, chill the knife in the freezer for 5 minutes before cutting.
That's it — you did it. But hold on, I've got a few more tricks that'll take this to another level...
Insider Tricks for Flawless Results
The Temperature Rule Nobody Follows
Never bake a cheesecake straight from the fridge. Let the batter sit at room temperature for 20 minutes before pouring it into the crust. This tiny step equalizes the temperature of the filling, ensuring an even rise and preventing the dreaded “crack line” that appears when the center cooks faster than the edges. I once baked a chilled batter and ended up with a cratered disaster—lesson learned.
Why Your Nose Knows Best
Instead of relying solely on a timer, trust the scent. When the edges turn a light golden brown and you catch a faint nutty aroma, the cheesecake is nearing perfection. The center will still wobble, but the peripheral scent is a reliable indicator that the interior will set perfectly as it cools. If you ignore this cue, you risk over‑baking, which leads to a dry texture.
The 5‑Minute Rest That Changes Everything
After the cheesecake has cooled to room temperature, give it an extra five‑minute rest before refrigerating. This pause allows the proteins to fully coagulate, resulting in a firmer slice that holds its shape. A friend once skipped this step and found his cheesecake crumbling into a puddle—don’t be that friend.
The Water‑Bath Secret
If you’re short on oven space, use a disposable aluminum foil pan for the water bath. It’s lightweight, conducts heat well, and you can discard it after use, saving you scrubbing time. Just make sure the water level stays at least halfway up the sides of the springform pan throughout the bake.
The Finish Line Glaze
For a glossy top without added sugar, lightly brush the cooled cheesecake with a mixture of 1 tablespoon melted butter and a splash of vanilla extract. This adds a subtle sheen and an extra layer of flavor that makes the dessert look restaurant‑ready. I tried this on a whim once and got compliments on both taste and presentation.
Creative Twists and Variations
This recipe is a playground. Here are some of my favorite ways to switch things up:
Cocoa Crunch
Add 2 tablespoons of unsweetened cocoa powder to the crust mixture and sprinkle a handful of chopped almonds on top before baking. The result is a chocolate‑loving version that still stays sugar‑free, perfect for cocoa addicts.
Citrus Zing
Stir in the zest of one lemon or orange into the filling, and replace half of the vanilla extract with a splash of citrus juice. The bright aroma cuts through the richness, offering a refreshing twist that pairs well with a dollop of sugar‑free whipped cream.
Berry Bliss
Fold ½ cup of fresh raspberries or blueberries into the batter just before pouring it into the crust. The berries burst during baking, creating tiny pockets of tangy sweetness that complement the creamy base.
Nutty Caramel
Create a drizzle using ¼ cup of sugar‑free caramel sauce (store‑bought or homemade with butter, heavy cream, and a sugar substitute). Drizzle over each slice right before serving for a luxurious finish that looks as good as it tastes.
Spiced Autumn
Add ½ teaspoon of ground cinnamon and a pinch of nutmeg to the filling. This warm spice blend turns the cheesecake into a cozy, fall‑ready dessert that still respects your low‑carb goals.
Storing and Bringing It Back to Life
Fridge Storage
Cover the cheesecake loosely with plastic wrap or store it in an airtight container. It will stay fresh for up to 4 days in the refrigerator. For best texture, let it sit at room temperature for 10 minutes before serving to allow the flavors to open up.
Freezer Friendly
Slice the cheesecake, then wrap each piece individually in parchment paper followed by a layer of foil. Freeze for up to 2 months. When you’re ready to enjoy, move the slice to the fridge overnight, then let it sit at room temperature for a few minutes.
Best Reheating Method
If you prefer a warm slice, place a single piece on a microwave‑safe plate, add a tiny splash (about 1 teaspoon) of water, and microwave on low for 15‑20 seconds. The water creates steam that revives the creamy texture without drying it out.