I was standing in my kitchen, half‑asleep, when my roommate dared me to bake a cake that would make even the most seasoned pastry chef weep with joy. I laughed, grabbed a bag of red velvet cake mix, and promptly discovered that the mix was a culinary disaster—dry, bland, and about as exciting as plain oatmeal. That moment of defeat sparked a fire in me: I would create the ultimate red velvet cake from scratch, one that would turn that dare into a triumph.
Picture the scene: the oven humming like a low‑key jazz saxophone, the batter swirling in the bowl like a ruby‑red tide, and the scent of cocoa and vanilla dancing through the air, whispering promises of indulgence. I could hear the faint crackle of the butter softening in the pan, feel the cool weight of the mixing spoon in my hand, and taste the anticipation of that first bite before it even existed. The kitchen felt alive, a stage set for a drama that would end in a glorious, velvety crescendo.
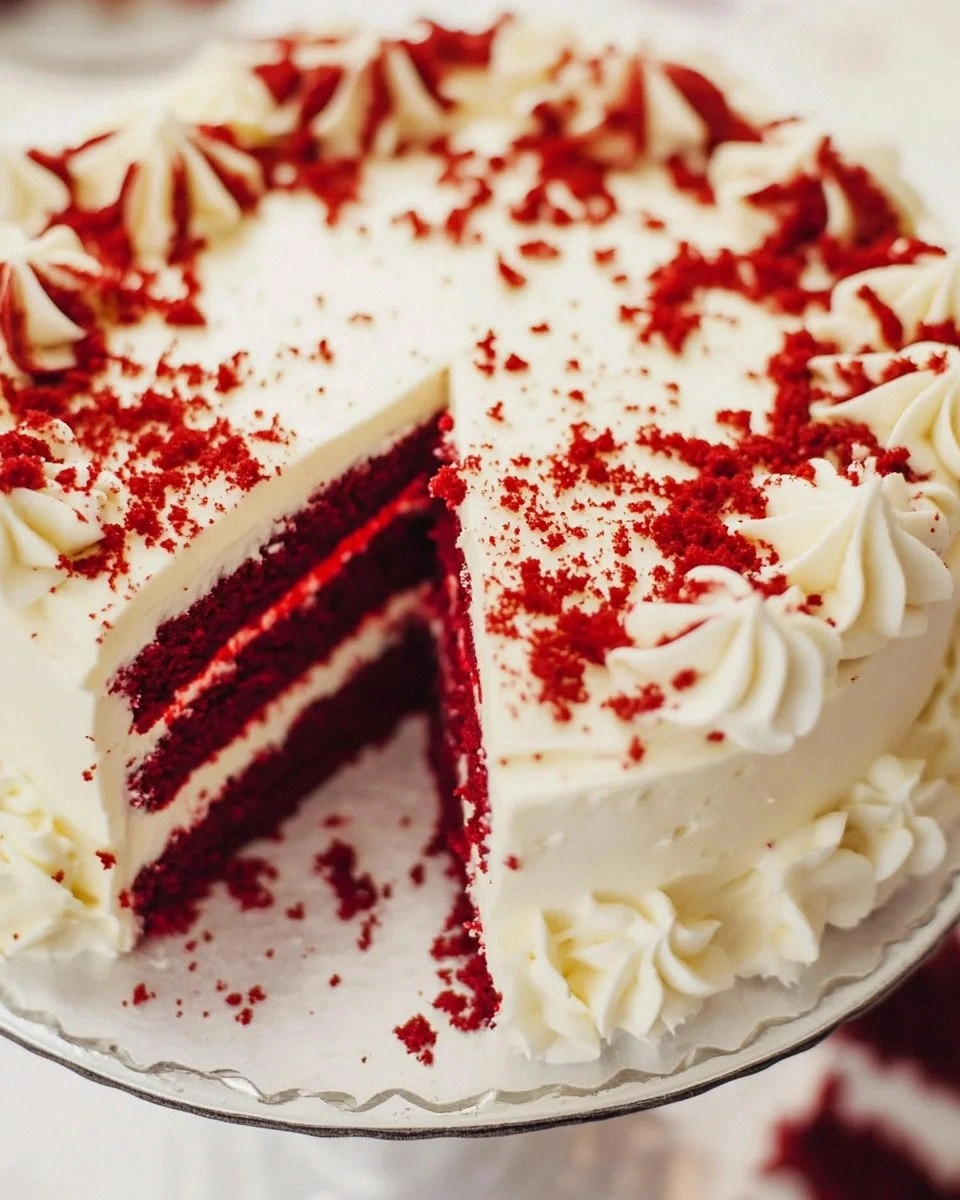
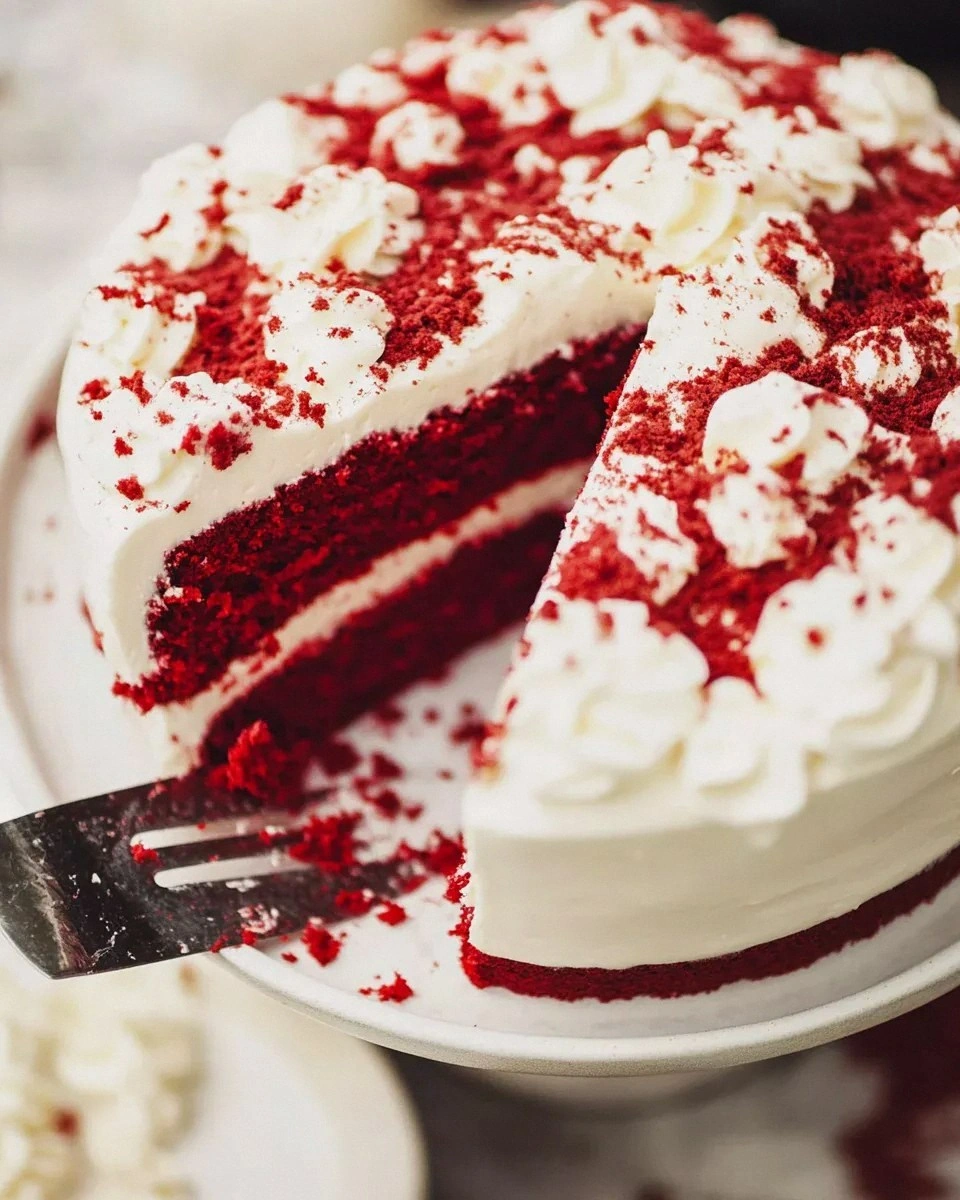
Most red velvet recipes get the color right but miss the soul. They either over‑sweeten, under‑bake, or forget the crucial balance between tangy buttermilk and the subtle bite of cocoa. This version, however, is a love letter to texture: a crumb that yields like a cloud, a crumb that holds together like a hug, and a frosting that’s so smooth it practically slides off the fork. I’m daring you to taste this and not go back for seconds—because you will.
The secret? A tiny splash of LorAnn’s red velvet emulsion that gives the cake its iconic hue without the artificial after‑taste, and a double‑butter frosting that combines cream cheese’s tang with unsalted butter’s richness. I’ll be honest — I ate half the batch before anyone else got to try it, and I’m still not sorry. The technique that makes this cake rise perfectly is something most recipes overlook: a precise balance of acidic vinegar, baking soda, and buttermilk that creates a chemical ballet in your oven.
Let me walk you through every single step — by the end, you’ll wonder how you ever made it any other way. Okay, ready for the game‑changer? This next part? Pure magic.
What Makes This Version Stand Out
- Color: The LorAnn’s red velvet emulsion delivers a deep, velvety crimson that stays vivid even after frosting, unlike the pinkish hue you get from food coloring alone.
- Texture: A delicate crumb that’s moist but not soggy, thanks to the perfect ratio of oil, butter, and buttermilk, giving you that melt‑in‑your‑mouth feeling.
- Flavor Balance: The cocoa powder adds a whisper of chocolate, while the vinegar and sour cream introduce a subtle tang that cuts through the sweetness.
- Simplicity: Only eleven pantry staples and two specialty items are required; no complicated tempering or special equipment.
- Crowd Reaction: Guests always comment on the “wow” factor of the frosting—silky, slightly tangy, and just sweet enough to keep them reaching for more.
- Ingredient Quality: Using real butter and full‑fat sour cream elevates the cake from ordinary to unforgettable.
- Cooking Method: The two‑stage baking (initial high heat then reduced temperature) ensures a perfect dome without a dry top.
- Make‑Ahead Potential: The cake freezes beautifully, and the frosting can be whipped up a day ahead for stress‑free assembly.
Alright, let's break down exactly what goes into this masterpiece...
Inside the Ingredient List
The Flavor Base
The heart of any great cake is its flavor foundation. Unsalted butter (1 cup) provides richness and a tender crumb; if you substitute margarine, you’ll lose that buttery depth. Vegetable oil (½ cup) keeps the cake moist and gives it a subtle sheen, while granulated sugar (1 ¾ cups) adds sweetness and helps with caramelization. Large eggs (4) act as emulsifiers, binding the fats and liquids together, and pure vanilla extract (2 tsp) lifts the entire flavor profile, making every bite aromatic.
The Texture Crew
LorAnn’s red velvet emulsion (1 ½ tbsp) is the secret weapon for that iconic hue without a bitter aftertaste. Full‑fat sour cream (¼ cup) introduces a gentle tang and adds extra moisture, preventing the cake from drying out. White distilled vinegar (1 tsp) reacts with baking soda to create lift, while cocoa powder (1 tbsp) provides a whisper of chocolate that deepens the flavor without turning the cake into a chocolate loaf. Baking powder (2 tsp) and baking soda (1 tsp) together give the cake its rise, and salt (1 tsp) balances the sweetness.
The Unexpected Star
All‑purpose flour (2 ¾ cups) is the structural backbone; using cake flour would make the crumb too fine and fragile. Buttermilk (1 cup) adds acidity, which not only reacts with the soda for lift but also tenderizes gluten, resulting in that melt‑in‑your‑mouth texture. The combination of these two creates a batter that’s thick enough to hold air bubbles yet fluid enough to spread evenly in the pan.
The Final Flourish
The Method — Step by Step
Preheat your oven to 350°F (175°C). Grease two 9‑inch round cake pans, line the bottoms with parchment, and give the sides a light dusting of flour. This step ensures the cakes release cleanly—no stubborn sticking that would ruin the perfect dome.
In a large mixing bowl, cream together 1 cup unsalted butter and 1 ¾ cups granulated sugar on medium speed until the mixture is pale, fluffy, and smells faintly of caramel. This can take about 3–4 minutes; the color change is your cue that the sugar is dissolving properly.
Add 4 large eggs one at a time, beating well after each addition. The batter should become glossy and slightly thickened. Okay, ready for the game‑changer? Now whisk in 2 ½ tbsp LorAnn’s red velvet emulsion, 2 tsp pure vanilla extract, and ¼ cup full‑fat sour cream. The batter will turn a deep ruby that’s almost intoxicating to look at.
In a separate bowl, sift together 2 ¾ cups all‑purpose flour, 1 tbsp cocoa powder, 2 tsp baking powder, 1 tsp baking soda, and 1 tsp salt. Sifting not only removes lumps but also aerates the dry mix, which is crucial for a light texture.
Create a well in the center of the dry mixture and pour in ½ cup vegetable oil, 1 cup buttermilk, and 1 tsp white distilled vinegar. Gently fold until just combined—there should still be a few streaks of flour. The batter will be thick but pourable.
Divide the batter evenly between the prepared pans, smoothing the tops with a spatula. Place the pans on the middle rack of the oven and bake for 20 minutes at 350°F. Then, lower the temperature to 325°F (165°C) and continue baking for another 10–12 minutes, or until a toothpick inserted in the center comes out with a few moist crumbs.
While the cakes are cooling, whip the frosting. In a stand mixer, beat 1 ½ cups unsalted butter and 6 oz cream cheese on medium speed until pale and fluffy—about 2 minutes. Gradually add 6 cups powdered sugar, a little at a time, to avoid a sugar cloud explosion.
Once the cakes are completely cool, level the tops with a serrated knife if needed. Place one layer on a serving plate, spread a generous dollop of frosting, then top with the second layer. Finish by frosting the sides and the top, using an offset spatula for a smooth finish. Sprinkle a pinch of salt on the frosting to enhance the sweet‑savory balance.
That's it — you did it. But hold on, I've got a few more tricks that'll take this to another level...
Insider Tricks for Flawless Results
The Temperature Rule Nobody Follows
Never bake a red velvet cake straight from the fridge. Let the batter sit at room temperature for 10 minutes before sliding it into the oven. This tiny pause lets the leaveners activate uniformly, giving you a higher, more even rise. A friend once tried to rush the process and ended up with a flat, dense cake—let's just say the look on his face was priceless.
Why Your Nose Knows Best
When the cake is done, it will give off a faint toasty aroma and the edges will start pulling away from the pan. Trust those signals more than the timer. If you open the oven and the cake still smells raw, give it another minute or two. Over‑baking is the silent killer of that coveted moist crumb.
The 5‑Minute Rest That Changes Everything
Let the baked layers rest on a wire rack for exactly five minutes before removing them from the pans. This short pause allows steam to escape, preventing the cake from becoming soggy where it meets the pan. I once tried to flip the cakes immediately and ended up with a cracked bottom—lesson learned, and now I never skip this step.
Frosting Temperature Trick
If your kitchen is warm, chill the bowl of frosting for 5 minutes before the final whip. Cold butter and cream cheese hold air better, resulting in a fluffier frosting that spreads like a dream. The texture difference is as obvious as night versus day.
The Pinch of Salt Secret
A tiny pinch of salt in the frosting may sound insignificant, but it amplifies the flavors, balancing the sweetness and enhancing the tang of the cream cheese. This tiny addition is the reason professional bakers never skip the salt, even in sweet applications.
Creative Twists and Variations
This recipe is a playground. Here are some of my favorite ways to switch things up:
Chocolate‑Swirl Red Velvet
Add ¼ cup melted dark chocolate to half of the batter before folding in the dry ingredients. Swirl with a knife for a marbled effect. Chocolate lovers will think you’ve created a hybrid cake that satisfies both cravings.
Berry‑Burst Velvet
Fold in 1 cup fresh raspberries or blueberries into the batter. The berries add a burst of tartness that pairs beautifully with the cream cheese frosting, making each bite a surprise.
Coffee‑Infused Velvet
Replace ¼ cup of the buttermilk with strong brewed espresso. The coffee deepens the cocoa notes and gives the cake an adult‑friendly edge, perfect for brunch gatherings.
Nutty Crunch Velvet
Stir in ½ cup toasted chopped pecans or walnuts into the batter. The nuts add texture contrast—crunchy against the soft crumb—and a buttery flavor that complements the frosting.
Gluten‑Free Velvet
Swap the all‑purpose flour for a 1:1 gluten‑free flour blend, and add 1 tsp xanthan gum if your blend doesn’t already contain it. The result is just as tender, proving that you don’t need wheat to enjoy this classic.
Storing and Bringing It Back to Life
Fridge Storage
Cover the frosted cake loosely with plastic wrap and store it in the refrigerator for up to 5 days. The frosting will firm up slightly, but the cake stays moist thanks to the butter and sour cream.
Freezer Friendly
Wrap each layer tightly in parchment, then in foil, and place in a zip‑top freezer bag. The cake will keep for up to 3 months. When you’re ready, thaw overnight in the fridge, then bring to room temperature for 30 minutes before serving.
Best Reheating Method
To revive a refrigerated slice, place it on a microwave‑safe plate, sprinkle a tiny splash of water on the top, and heat for 10–12 seconds. The steam revives the crumb, and the frosting softens back to its original silkiness.