I still remember the day I ruined a perfectly good batch of cookies. It was one of those gray November afternoons where the sky looks like wet concrete and the air smells like woodsmoke and rain-soaked leaves. I'd promised my neighbor I'd bring over something seasonal for her harvest party, and I thought, "How hard could apple cider cookies be?" Famous last words. The first batch tasted like someone had dissolved a scented candle into flour. The second batch spread into one giant, sad cookie sheet pancake. By the third attempt, I was out of cider, out of patience, and out of dignity. But here's the thing about kitchen disasters: they force you to pay attention. I started asking why nobody's cider cookies ever actually tasted like cider, why they were always puffy little cakes instead of chewy, buttery marvels, why the apple flavor vanished the second the dough hit the oven. Six pounds of butter, two gallons of cider, and one minor sugar burn later, I cracked the code. What I'm about to share isn't just another autumn cookie recipe — it's the accumulated wisdom of every mistake I made so you don't have to. We're talking deep, concentrated apple flavor that punches through the dough like a brass section in a marching band, edges that crisp into caramelized lace, centers that stay soft and almost custardy, and a aroma that will make your mail carrier ring the doorbell twice just to ask what you're baking. If you've ever bitten into a so-called cider cookie and thought, "This just tastes like cinnamon and disappointment," stay with me. By the time we're done, you'll have a cookie that tastes like fall decided to throw a party in your mouth and invited all its friends.
Picture this: you pull a tray from the oven, the kitchen windows fogged with steam, the air thick with the scent of brown butter and reduced cider. The cookies are still puffed from the heat, their edges just beginning to crack and caramelize. You wait — agonizing, I know — for that first one to cool enough to handle. When you finally bite down, the edge shatters delicately, giving way to a chewy center that's somehow both tender and substantial. The flavor hits in waves: first the warm spices, then the deep apple essence that's more orchard than juice box, finally the nutty richness of browned butter lingering like the last note of a favorite song. That first cookie disappears in three bites, and before you know it you're reaching for a second, rationalizing that quality control is crucial. I dare you to taste these and not go back for seconds. Actually, I dare you to stop at three. My record is six in one sitting, and I regret nothing.
What separates these from every other cider cookie you've tried is that we don't just dump in some bottled juice and hope for the best. We reduce a full cup of fresh, cloudy cider down to a quarter cup of concentrated apple elixir that tastes like autumn distilled into syrup. Then we brown the butter until it smells like hazelnuts and toffee, because fat carries flavor better than anything else in your kitchen. We use both apple pie spice and a whisper of cardamom, because the best apple desserts taste like apples first and spice second. The result is a cookie that doesn't just remind you of fall — it tastes like someone captured the season and baked it into something you can hold in your hand.
Okay, ready for the game-changer? We're not stopping at the cookie itself. While they're still warm, we're brushing them with an apple-cider-brown-butter glaze that seeps into every crack and crevice. Then — and this is where people start involuntarily making happy noises — we dust them with cinnamon sugar while the glaze is still tacky, creating this delicate, sparkly crust that crackles when you bite it. These aren't cookies you serve on a paper napkin. These are cookies you plate on your good dishes, the ones you save for people who understand that dessert can be an event. Let me walk you through every single step — by the end, you'll wonder how you ever made it any other way.
What Makes This Version Stand Out
Concentrated Cider Power: Most recipes add liquid cider and end up with cakey, bland cookies. We reduce a full cup down to four tablespoons of intense apple flavor that actually tastes like something.
Browned Butter Brilliance: By cooking the butter until the milk solids turn golden, we add layers of nutty, caramel complexity that makes the apple flavor taste expensive and sophisticated.
Texture Perfection: The combination of cornstarch for tenderness and the right ratio of brown to white sugar gives us crisp edges and chewy centers — no cakey disappointment here.
Double Apple Impact: We don't stop at the cider reduction. A whisper of apple butter in the dough adds another layer of fruit flavor that survives the baking process.
Make-Ahead Magic: The dough freezes beautifully, so you can have fresh-baked cookies in fifteen minutes whenever the craving hits. Trust me, the craving will hit.
Glaze That Actually Matters: Instead of a cloying sugar blanket, our apple-cider-brown-butter glaze soaks in slightly, adding moisture and intensifying the apple flavor without overwhelming sweetness.
Spice Balance That Works: Most recipes overdose on cinnamon and call it a day. We use apple pie spice or pumpkin pie spice for complexity, but in restrained amounts that let the apple be the star.
Visual Drama: These cookies don't just taste incredible — they look like something from a boutique bakery, with crackly tops, caramelized edges, and that tempting glossy sheen from the glaze.
Inside the Ingredient List
The Flavor Base
Apple cider is the soul of this recipe, but not just any cider will do. You want the cloudy, unfiltered stuff that looks like liquid fall — the kind that still has apple sediment swirling around like tiny autumn snow globes. Clear filtered cider is basically apple-flavored water, and your cookies will taste like disappointment and wasted potential. When you reduce it, magic happens: the water evaporates, leaving behind concentrated apple sugars and acids that taste like biting into the perfect Honeycrisp. This process takes about fifteen minutes, during which your kitchen will smell like a cider mill had a baby with a caramel factory. Don't rush it. The difference between three tablespoons and four tablespoons of reduction is the difference between "these are nice" and "I need to sit down."
Browned butter is what separates amateur cookies from the ones that make people close their eyes when they take a bite. As the butter melts and the milk solids sink to the bottom of the pan, they gradually transform from pale yellow to golden brown, releasing compounds that smell like toasted nuts and caramel. This isn't just about adding flavor — it's about adding depth. The nutty notes complement the apple in ways that make people unable to quite identify why these cookies taste so much more sophisticated than anything they've had before. One caveat: browning butter goes from perfect to burnt faster than you can say "smoke alarm." Watch it like you're expecting it to commit a crime.
The Texture Crew
All-purpose flour provides the structure, but we don't want these cookies to taste like bread. The trick is using just enough to hold everything together without crossing into hockey puck territory. I tested versions with cake flour (too delicate), bread flour (too chewy), and even a gluten-free blend (fine, but why complicate things?). Regular AP flour gives us exactly what we need: enough protein to create chew, but not so much that we lose that tender bite we're after.
Cornstarch is my secret weapon for achieving that bakery-style soft center. Just two teaspoons tenderizes the gluten, creating a cookie that bends rather than breaks when you snap it in half. It's the difference between a cookie that tastes fresh for three days versus one that turns into a brick overnight. If you've ever wondered why your homemade cookies don't have that soft, almost velvety texture of the ones from the fancy bakery, this is probably what you're missing.
The combination of baking powder and baking soda might seem like overkill, but each plays a different role. Baking soda needs acid to activate, which it gets from our reduced cider and brown sugar, creating lift and helping with browning. Baking powder provides extra rise independent of acid, ensuring our cookies puff up into gorgeous, crackle-top domes instead of spreading into sad puddles.
The Unexpected Star
Apple pie spice is traditional, but here's where I go rogue: I add a pinch of cardamom. Not enough to identify it, just enough to make people ask, "What is that amazing flavor?" Cardamom has this lemony, minty, almost eucalyptus quality that makes apple taste more like apple — it's like adding a spotlight to a performer who's already singing beautifully. If you don't have apple pie spice, pumpkin pie spice works beautifully. They're cousins anyway, both full of cinnamon, nutmeg, ginger, and cloves. The difference is apple pie spice usually has a touch of cardamom already, while pumpkin spice leans heavier on ginger. Use what you have, but don't skip the spices entirely unless you want cookies that taste like sweet bread.
The Final Flourish
Brown sugar isn't just for sweetness — it's a flavor ingredient. The molasses adds caramel notes and moisture that keep these cookies soft for days. I use dark brown sugar because I'm a maximalist, but light brown works if that's what you've got. The real key is packing it firmly when you measure, then fluffing it up before creaming so it incorporates evenly. Lumps of brown sugar in your cookies are like finding pebbles in your shoes — not dangerous, just deeply annoying.
One whole egg plus one yolk gives us the perfect balance of structure and richness. The white provides protein for chew, while the extra yolk adds fat for tenderness and that gorgeous golden color. Skip the extra yolk and your cookies will still taste good, but they'll lack that bakery-quality richness that makes people reach for a second before they've finished their first.
Everything's prepped? Good. Let's get into the real action...
The Method — Step by Step
- Start with the cider reduction because it needs to cool completely before meeting the dough. Pour one cup of fresh, unfiltered apple cider into a wide skillet — the wider the better, since surface area is your friend here. Bring it to a boil over medium-high heat, then reduce to a lively simmer. Let it bubble away, swirling occasionally, until it reduces to about three to four tablespoons of syrupy liquid. This takes fifteen to twenty minutes depending on your pan and stove, but don't walk away — the transition from perfect to burnt apple candy happens fast. When it's ready, it should coat the back of a spoon and smell like you're standing in an orchard during peak harvest. Pour it into a small bowl and let it cool while you brown the butter. You'll know you nailed it when the reduction is thick enough that a line drawn with your spatula stays visible for a few seconds.
- Now for the butter ballet. Cut two sticks of unsalted butter into chunks and place them in a light-colored saucepan — you need to see the color change, and dark pans make that impossible. Melt over medium heat, then continue cooking, stirring frequently with a rubber spatula. The butter will foam, then the milk solids will sink to the bottom and gradually turn from pale to golden to amber. When it smells like toasted hazelnips and the solids are chestnut brown, immediately pour it into a heatproof bowl, scraping in all those flavorful browned bits. They look like nothing special, but they're liquid gold for flavor. Let this cool until it's no longer hot to the touch but still liquid — about fifteen minutes. If it solidifies, just warm it briefly in the microwave.
- While everything cools, whisk together your dry ingredients. In a medium bowl, combine two and a quarter cups of all-purpose flour, two teaspoons of cornstarch, one teaspoon of baking powder, half a teaspoon of baking soda, two teaspoons of apple pie spice, half a teaspoon of salt, and a pinch of cardamom if you're using it. Whisk thoroughly — you want the leavening agents evenly distributed so you don't get one cookie that tastes like a volcano and another that's dense as a hockey puck. Set this aside and try not to sample the raw flour like my husband does every single time, claiming he's "checking for freshness."
- In the bowl of a stand mixer (or with a hand mixer if you're feeling ambitious), combine one cup of packed dark brown sugar and half a cup of granulated sugar. Pour in your cooled browned butter — it should still be liquid but not warm. Beat on medium speed until the mixture looks like wet sand, about two minutes. Add one whole egg and one egg yolk, then beat until the mixture lightens in color and thickens slightly. This takes about three minutes, and it's crucial for structure — you're creating an emulsion that will trap air and give you lift. Mix in two teaspoons of vanilla extract and your cooled cider reduction. The batter will look slightly curdled and smell like you're about to make the best decision of your life.
- Add your dry ingredients all at once. Mix on low speed just until the flour disappears — no more. Overmixing develops gluten and gives you tough cookies that could double as construction materials. The dough will be soft and slightly sticky, like thick brownie batter. This is perfect. If it's runny like cake batter, your cider reduction was too warm and melted the butter. Pop the bowl in the fridge for fifteen minutes and proceed anyway — they'll still taste incredible, just slightly flatter.
- Cover the bowl with plastic wrap pressed directly onto the surface to prevent a skin from forming. Refrigerate for at least two hours or up to three days. This rest does three things: it firms up the butter so the cookies don't spread into puddles, it hydrates the flour for better texture, and — most importantly — it gives the flavors time to meld and deepen. I've baked these after just one hour of chilling and they're still better than most bakery cookies, but after an overnight rest? That's when they achieve their full potential.
- When you're ready to bake, preheat your oven to 350°F with a rack in the center. Line two baking sheets with parchment paper — these cookies will stick like they owe you money if you skip this step. Use a medium cookie scoop or two spoons to portion dough into balls about two tablespoons each. Roll them briefly between your palms to make them round — this helps them bake evenly and gives you those perfect crackly tops. Place them two inches apart on the prepared sheets. They spread less than chocolate chip cookies but more than shortbread, so give them room to do their thing.
- Bake one sheet at a time for twelve to fourteen minutes, rotating halfway through. They're done when the edges are set and golden brown, but the centers still look slightly underbaked — they'll continue cooking from residual heat. This is crucial for that soft, chewy center. If you wait until the centers look fully set, you'll end up with crisp cookies that taste fine but lack that gooey middle that makes people close their eyes when they take a bite. The tops should be crackly and slightly puffed, like someone took a perfect chocolate chip cookie and gave it an autumn makeover.
- Let them cool on the baking sheet for five minutes — no more, no less. Too short and they'll fall apart when you move them. Too long and they'll stick to the parchment. Transfer to a wire rack to cool completely, or at least until you can't stand it anymore and decide that third-degree tongue burns are a reasonable price for immediate gratification. While they're still warm, brush with the apple cider brown butter glaze (see next section) and watch it soak in like the cookies are drinking up liquid autumn.
That's it — you did it. But hold on, I've got a few more tricks that'll take this to another level...
Insider Tricks for Flawless Results
The Temperature Rule Nobody Follows
Here's the thing about butter temperature that changes everything: when we brown butter, we're essentially cooking out water and toasting milk solids. This means our browned butter has a different composition than regular softened butter, and it solidifies differently. If you let it cool completely until it's firm again, your cookies will be dense and greasy. If it's too warm when you mix it in, the dough will separate and look curdled. The sweet spot is when it's liquid but just barely warm — about the temperature of a comfortable bath. I test by sticking my finger in (clean, promise). If it's hot, I wait. If it's cool and liquid, we're golden. This single tip took my cookies from good to "people ask if I went to pastry school."
Why Your Nose Knows Best
Don't rely on timers alone for the cider reduction or the browned butter. Your nose is more reliable than any clock. When the cider is ready, it will smell intensely like apples and caramel, with almost a boozy note from the concentrated sugars. If it smells like apple candy, you've gone too far. Same with the butter: when it smells like hazelnuts and toffee and you can't stop inhaling, pull it off the heat immediately. It will continue browning in the hot pan. A friend tried to multitask during this step once and ended up with butter that tasted like burnt popcorn. Learn from her trauma.
The 5-Minute Rest That Changes Everything
After you mix the dough, let it rest for five minutes before chilling. This brief pause lets the flour hydrate fully, which prevents that raw flour taste and helps the spices bloom. It's like letting a good stew sit — the flavors meld and deepen in ways that make a measurable difference in the final cookie. I discovered this by accident when I got distracted by a phone call, and the batch I made after the interruption was noticeably better than the ones I'd rushed. Now it's part of my routine, like preheating the oven or lining the sheets.
Glaze Timing Is Everything
Brush the glaze on while the cookies are still warm but not hot — think slightly above room temperature. Too hot and the glaze will run right off, creating a sticky mess on your cooling rack. Too cool and it won't absorb properly, just sitting on top like an unwelcome guest. The perfect timing is when you can hold a cookie comfortably but still feel gentle warmth. The glaze should soak in slightly, leaving a shiny surface that dries to a soft sheen rather than a hard shell.
Storage That Actually Works
Here's the real test of a great cookie: how does it taste on day three? These stay incredible for up to five days in an airtight container, but only if you include a slice of apple or a piece of bread. The cookies will pull moisture from the apple/bread instead of drying out, staying soft and chewy. Replace the apple slice every other day. It's like having a tiny humidifier in your cookie jar. Without this trick, they still taste great but lose that just-baked softness that makes them special.
Creative Twists and Variations
This recipe is a playground. Here are some of my favorite ways to switch things up:
Salted Caramel Apple Dreams
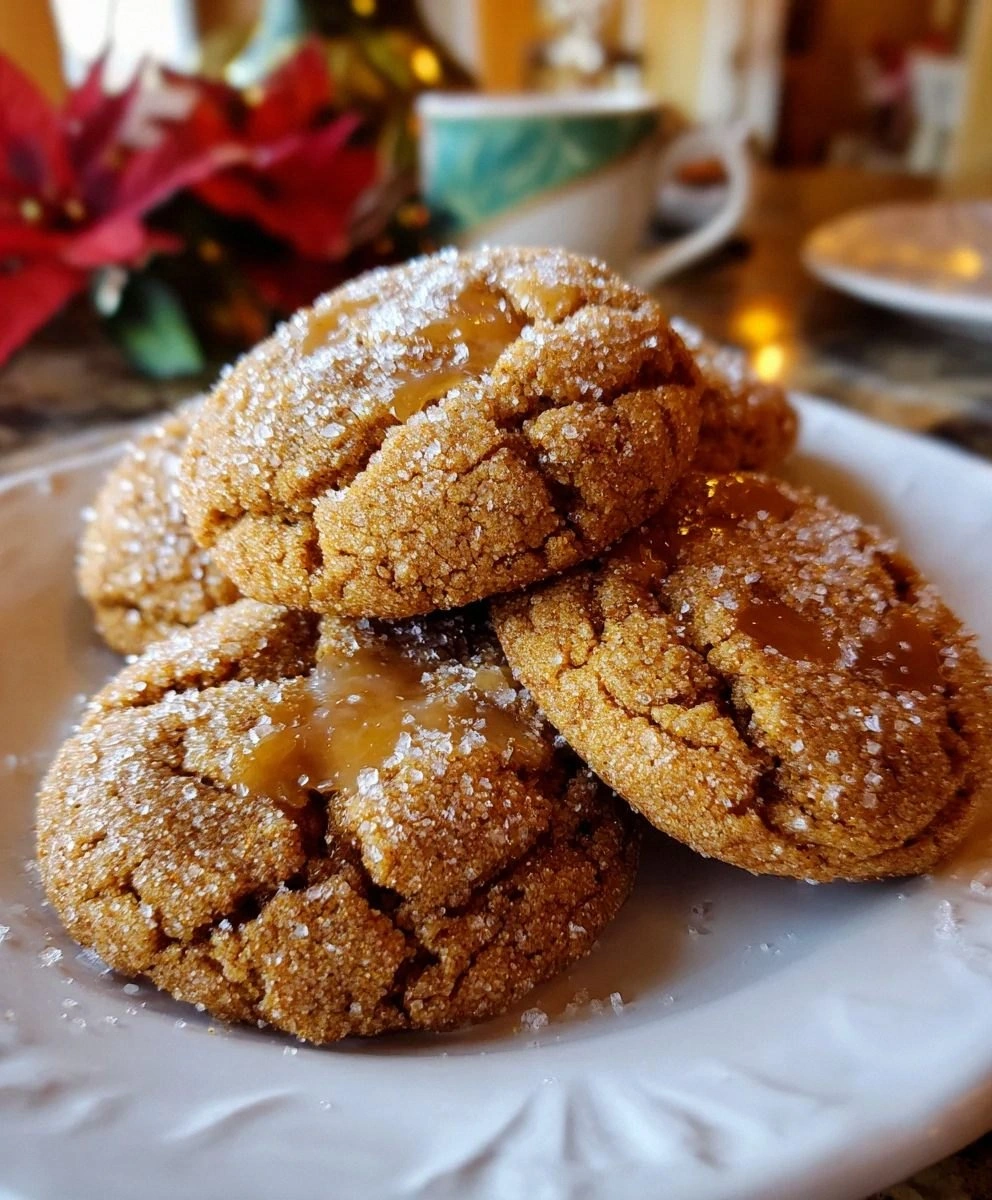
Drizzle cooled cookies with homemade salted caramel instead of the cider glaze. The sweet-salty combination with the apple spices tastes like someone wrapped a caramel apple in cookie form. Add a sprinkle of flaky sea salt on top while the caramel is still tacky. These disappear at potlucks faster than you can say "did you bring the recipe?"
Maple Bourbon Grown-Up Version
Replace two tablespoons of the cider reduction with good bourbon, and swap the granulated sugar for maple sugar if you can find it. The bourbon bakes off but leaves behind this warm, vanilla-wood note that makes these taste like they cost ten dollars each at a fancy bakery. Perfect for holiday cookie swaps where you want to be the person who brought the sophisticated cookies.
Streusel-Topped Crumb Bombs
Before baking, press a tablespoon of cinnamon streusel on top of each cookie. As they bake, the streusel creates a crumbly, buttery topping that contrasts beautifully with the chewy cookie underneath. It's like someone couldn't decide between coffee cake and cookies, so they made both at once. Pro tip: make extra streusel and freeze it — you'll want it on everything once you try this.
Sharp Cheddar Surprise
Fold in half a cup of finely shredded sharp cheddar with the dry ingredients. It sounds weird until you remember that apple pie with cheddar is a thing for a reason. The cheese melts into savory pockets that make the apple flavor pop in the most unexpected way. People can never quite identify what makes these so addictive, but they'll ask you to make them again and again.
Breakfast Cookie Makeover
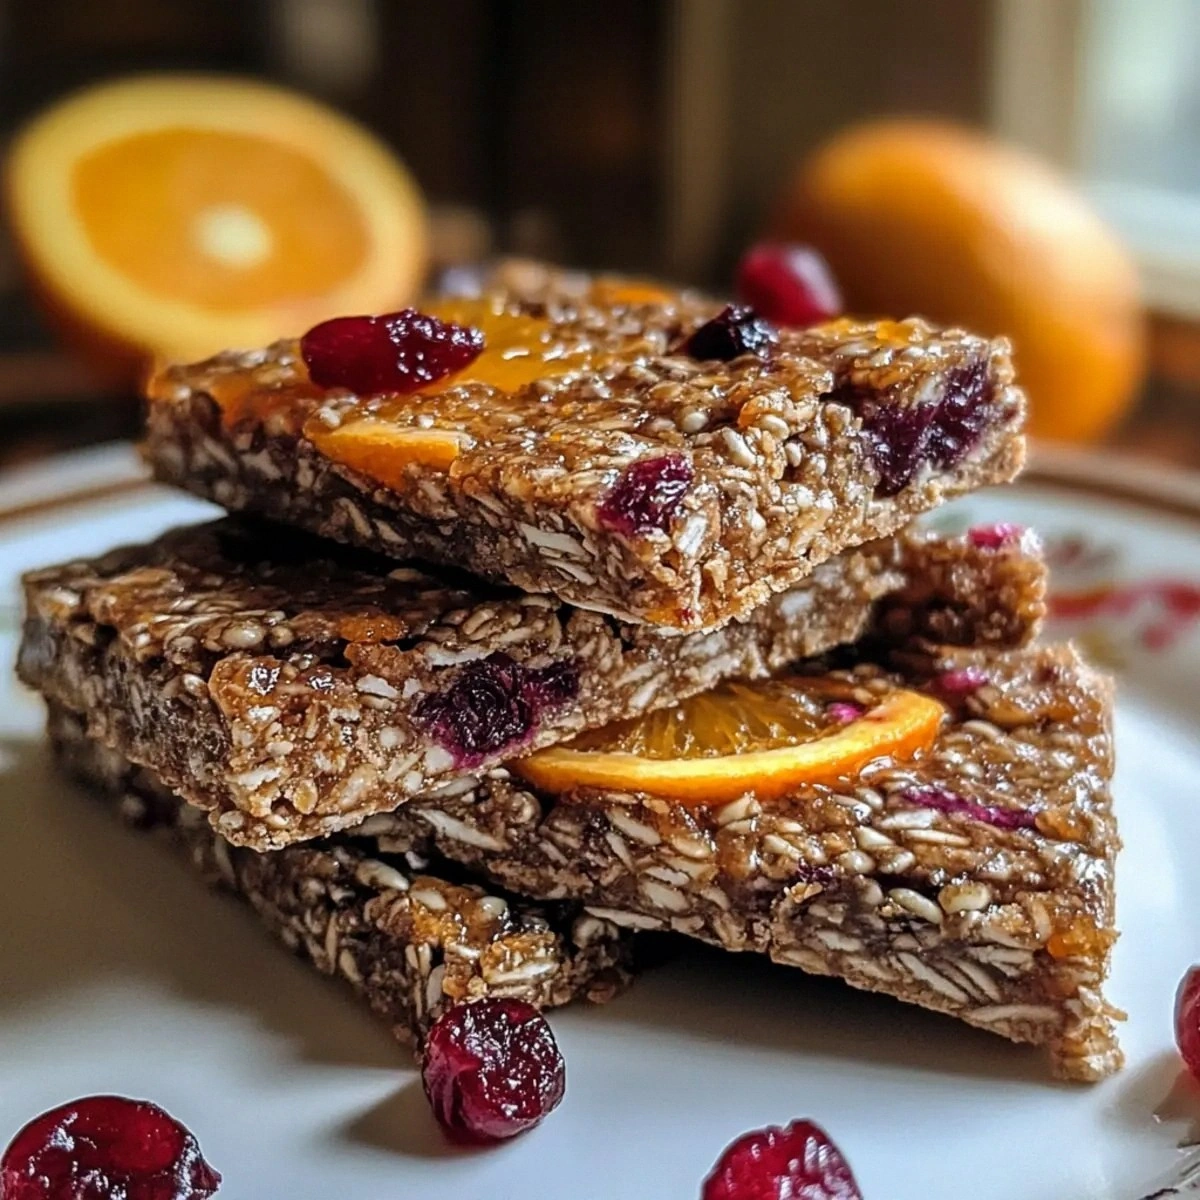
Add half a cup of rolled oats and replace half the flour with white whole wheat flour. Stir in dried cranberries and chopped pecans. These make perfect grab-and-breakfast cookies that feel virtuous enough for 7 AM but taste indulgent enough for dessert. The oats absorb some of the moisture, creating a cookie that's almost like a soft granola bar.
Chocolate Chunk Rebel
Sometimes I fold in chunks of good dark chocolate (not chips — the irregular chunks melt better) and skip the glaze entirely. The bitterness of the chocolate plays against the sweet apple spices in ways that make people do a double-take. It's not traditional, but neither am I, and these are the cookies I make when I want to impress people who think they've tried every apple dessert imaginable.
Storing and Bringing It Back to Life
Fridge Storage
Keep baked cookies in an airtight container at room temperature for up to five days. Layer them between sheets of parchment or wax paper if you're stacking them — the glaze can make them stick together in humid weather. Add a slice of apple or bread to maintain moisture, replacing every other day. They actually taste better on day two as the flavors meld, so these are perfect for making ahead when you need to bring something to a party but don't want to bake the morning of.
Freezer Friendly
Both the dough and baked cookies freeze beautifully. For dough, scoop into balls and freeze on a sheet pan until solid, then transfer to a freezer bag. Bake from frozen, adding two extra minutes to the time. For baked cookies, cool completely, then freeze in a single layer before stacking in a container. They thaw in about fifteen minutes on the counter, or you can microwave them for ten seconds for that fresh-baked experience. The glaze might look slightly less glossy after freezing, but the flavor is unchanged.
Best Reheating Method
Revive day-old or thawed cookies by wrapping them in a damp paper towel and microwaving for eight to ten seconds. The steam softens them perfectly without making them soggy. Alternatively, place them in a 300°F oven for five minutes. This refreshes the edges while keeping the centers soft. Never reheat longer than ten minutes or you'll end up with something that tastes like a crouton. Trust me on this — I got distracted once and created apple-flavored hockey pucks that could have broken windows.