I was in the middle of a rainy Saturday afternoon when my roommate dared me to create a dessert that could make even the most stubborn calorie counter weep. I stared at a half‑eaten apple crumble that had turned into a soggy mess, and I thought, “If this is going to happen again, I need a plan.” The kitchen was a symphony of clattering pans, the faint hiss of the oven, and the sweet, tart perfume of fresh‑sliced Granny Smiths waiting to be transformed. I grabbed a bag of cream cheese, a tub of sour cream, and a box of graham crackers, and the idea for the ultimate apple crisp cheesecake was born.
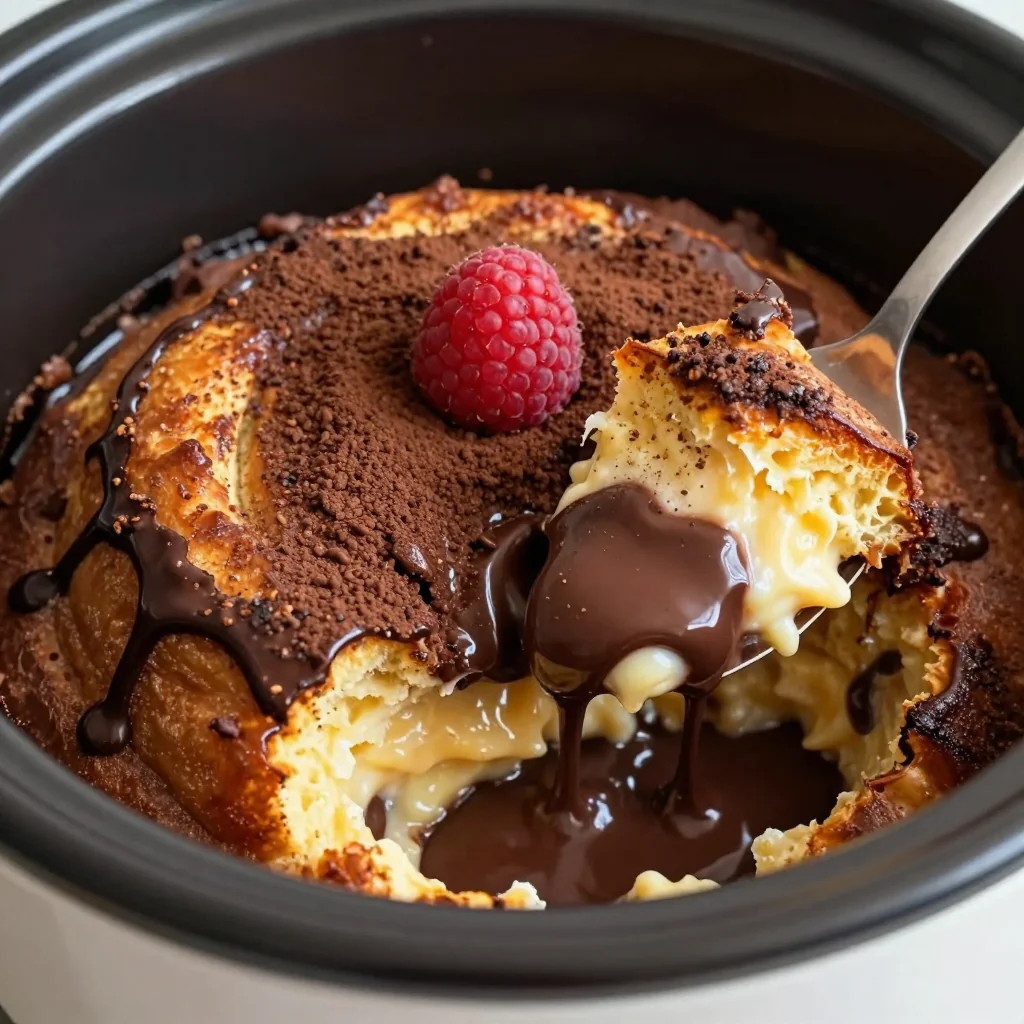
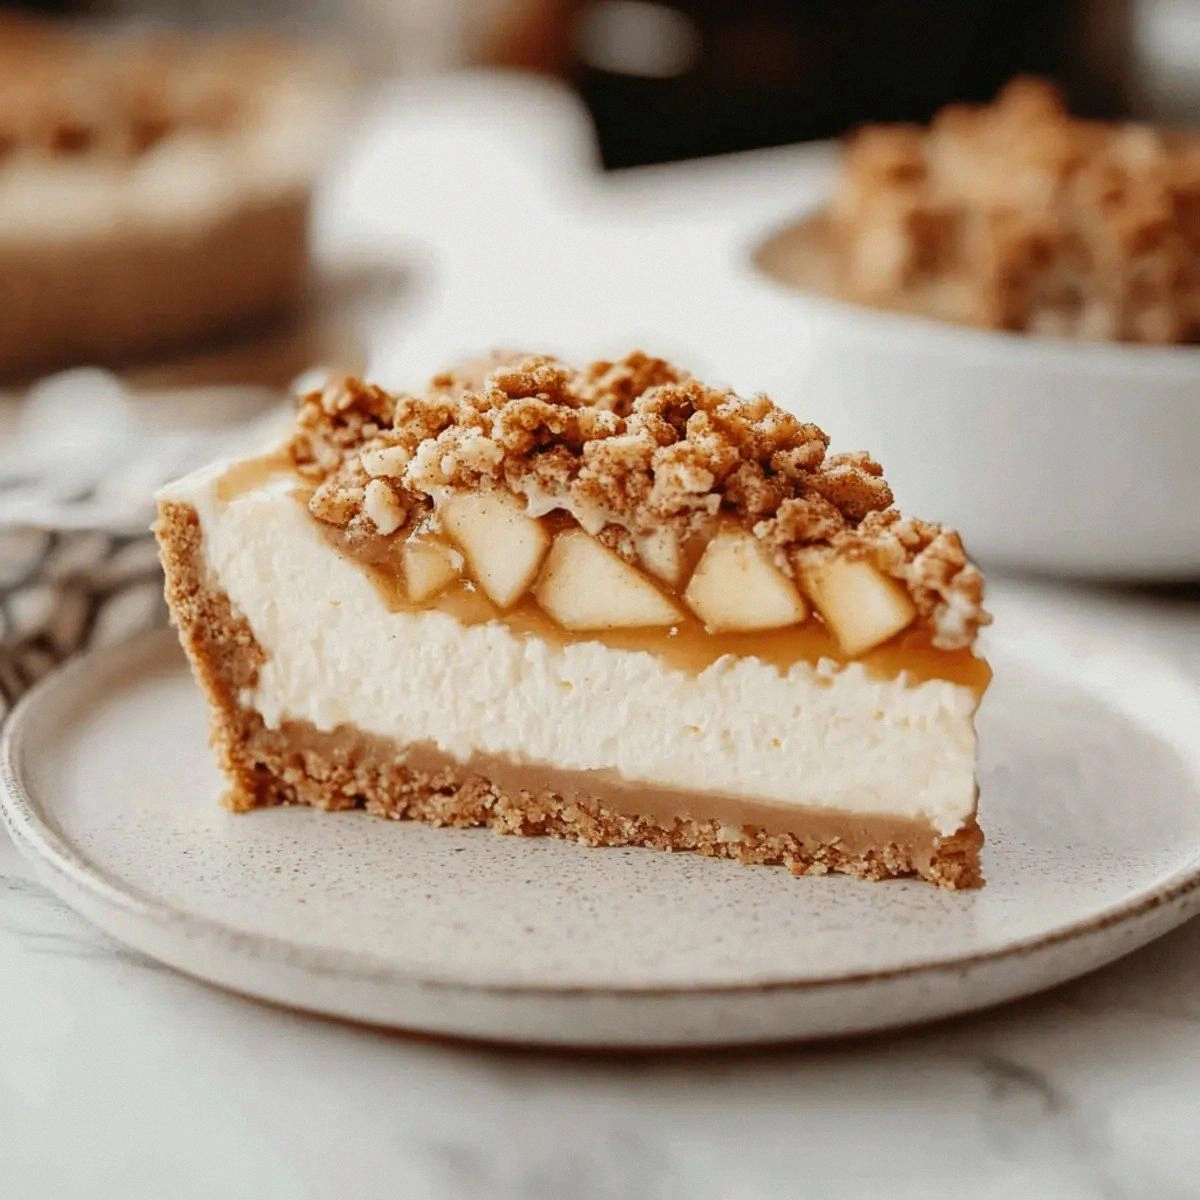
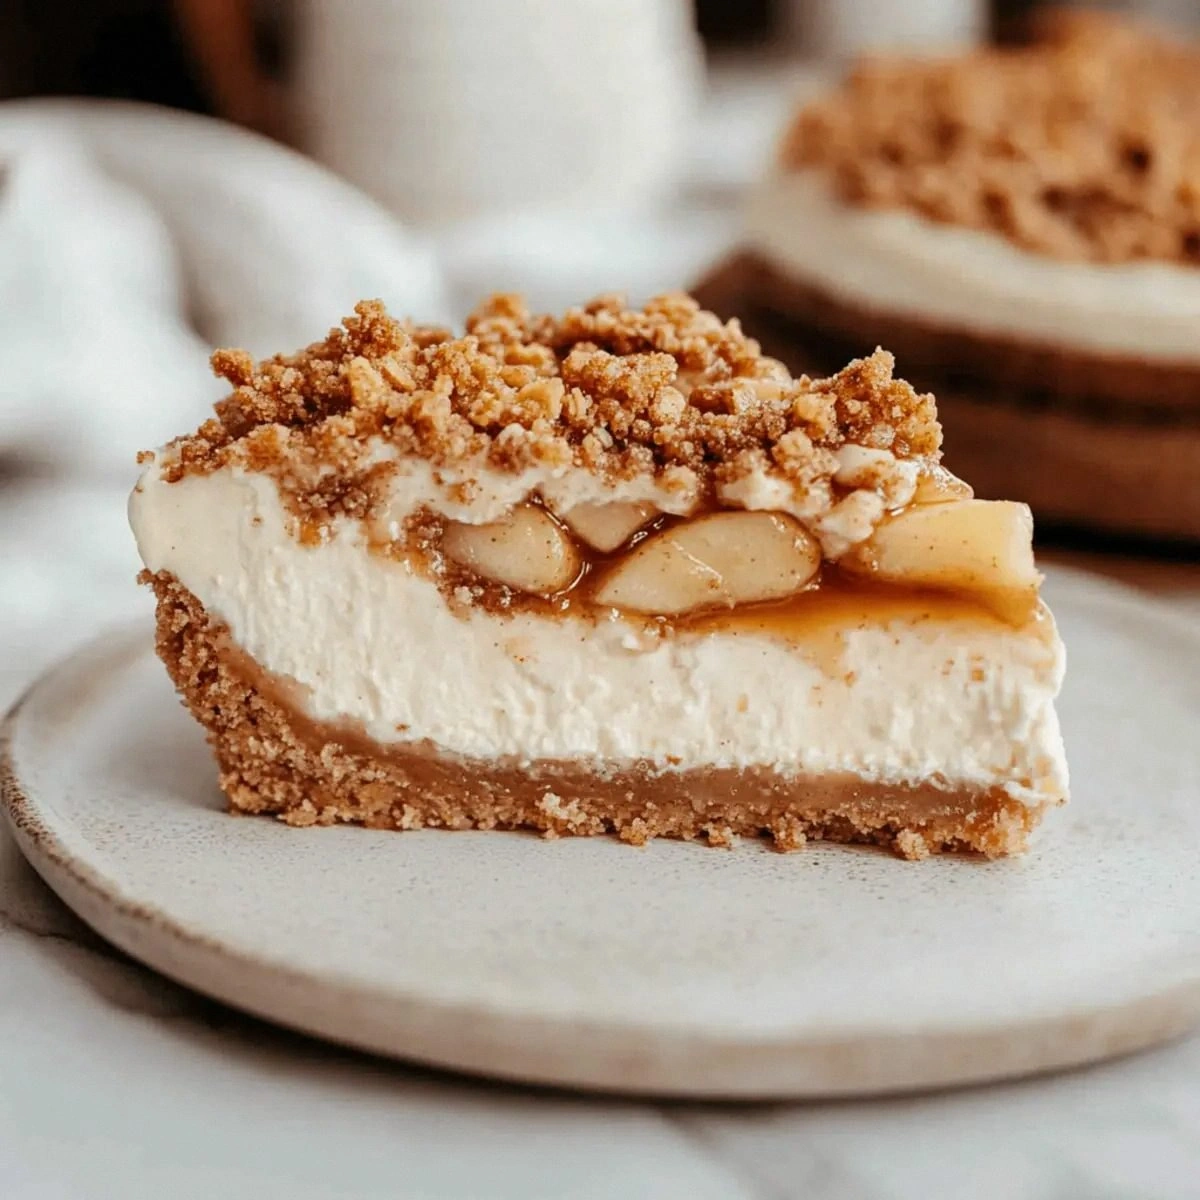
Picture this: a buttery graham‑cracker crust that cradles a velvety cheesecake layer, studded with a swirl of cinnamon‑spiced apples that have been caramelized to a perfect amber. On top sits a crunchy oat‑and‑butter crumble that shatters like thin ice when you dig in, releasing a burst of warm spice that makes you want to curl up with a blanket and a good book. The moment the knife cuts through, the cheesecake yields like a cloud, while the crisp topping offers a satisfying crunch that echoes through the kitchen. That contrast—silky meets crunchy—is what makes this dessert a true show‑stopper.
Most recipes either treat the cheesecake and the apple crisp as separate entities, or they drown the delicate cream cheese in a sea of sugary apples. I’ve tried both, and they always fell flat—either the crust got soggy, or the apples overpowered the subtle tang of the cream cheese. This version, however, balances each component with surgical precision, using a double‑layered butter base to keep the crust crisp and a light hand with the sugars so the natural apple flavor shines through. I’m daring you to taste this and not go back for seconds; the harmony is that addictive.
Okay, ready for the game‑changer? I’m about to reveal a secret technique that most bakers overlook: a quick butter‑oil emulsification for the topping that locks in moisture while still delivering that coveted crunch. It’s pure magic, and it’s what separates a good cheesecake from an unforgettable one. Let me walk you through every single step — by the end, you’ll wonder how you ever made it any other way.
What Makes This Version Stand Out
- Texture: A buttery crust that stays firm, a silky cheesecake that melts on your tongue, and a crisp topping that crackles like fresh snow underfoot. Each bite delivers a distinct mouthfeel that keeps you hooked.
- Flavor Balance: The tartness of Granny Smith apples cuts through the richness of the cream cheese, while a whisper of cinnamon ties the whole thing together without overwhelming any single element.
- Simplicity: Despite the layered appearance, the ingredient list is short, and the steps are straightforward—no fancy equipment, just a 9‑inch springform pan.
- Uniqueness: Combining a classic New York‑style cheesecake with an autumn apple crisp is a twist you won’t find in the average cookbook, giving you bragging rights at any gathering.
- Crowd Reaction: I’ve served this at potlucks and family reunions, and the reaction is always the same: “Is this store‑bought?!” The “wow” factor is off the charts.
- Ingredient Quality: Using real butter, fresh sour cream, and crisp apples makes a world of difference—no shortcuts, no artificial flavors.
- Cooking Method: A gentle bake at a lower temperature prevents cracking, while a final broil gives the topping that golden, caramelized edge.
- Make‑Ahead Potential: Assemble the night before, chill, and bake right before serving. It’s perfect for busy hosts who still want to wow their guests.
Alright, let's break down exactly what goes into this masterpiece...
Inside the Ingredient List
The Flavor Base
The star of the show is the 16 oz cream cheese. This is the foundation of the cheesecake’s luxurious texture. If you skimp on quality, the entire dessert feels cheap. Opt for a full‑fat, block‑style cream cheese—its higher fat content gives that melt‑in‑your‑mouth feel. Should you need a dairy‑free version, try a plant‑based cream cheese, but expect a slightly different mouthfeel.
1 cup granulated sugar adds sweetness without the molasses notes you’d get from brown sugar. It dissolves quickly, preventing grainy pockets. If you prefer a deeper caramel flavor, you can substitute half with light brown sugar, but watch the moisture level.
1/2 cup brown sugar introduces a subtle hint of caramel that complements the apples beautifully. It also contributes to the browning of the crust during baking. For a healthier twist, try coconut sugar, though it will impart a faint coconut undertone.
The Texture Crew
1 cup sour cream is the secret weapon that keeps the cheesecake from becoming dense. Its acidity balances the richness of the cream cheese, while its fat content adds a creamy silkiness. If you’re out of sour cream, Greek yogurt (full‑fat) works as a 1‑to‑1 substitute.
3 large eggs act as the binder that holds the cheesecake together. They also provide lift, giving the cake a light, airy crumb. Over‑beating can incorporate too much air, leading to cracks—beat just until blended.
1 teaspoon cinnamon (for the cheesecake) infuses the batter with warm spice, echoing the autumnal theme. Freshly ground cinnamon yields a brighter flavor than pre‑ground, so grind it yourself if you can.
The Unexpected Star
4 cups apples (Granny Smith) provide the tart backbone that cuts through the richness. Their firm texture holds up during baking, preventing a mushy base. If Granny Smiths are unavailable, try Pink Lady apples for a slightly sweeter note.
1 teaspoon cinnamon (for the crisp topping) doubles down on that cozy spice, ensuring the apples and crumble sing in harmony. You can add a pinch of nutmeg for extra depth.
The Final Flourish
1.5 cups graham cracker crumbs create the buttery, slightly sweet crust that anchors the cheesecake. Use a food processor for a fine texture, or crush them by hand for a rustic feel. Gluten‑free graham crackers work just as well.
1/2 cup unsalted butter melted and mixed with the crumbs provides the necessary fat to keep the crust crisp. Melt the butter gently; overheating can cause the crumbs to become soggy.
1 cup rolled oats add body to the topping, delivering that satisfying crunch. For a gluten‑free version, substitute with certified gluten‑free oats.
1/4 cup butter (for the topping) is combined with oats and a splash of brown sugar to create a caramelized crumble that turns golden under the broiler. Using clarified butter can raise the smoke point, giving a deeper caramelization without burning.
Everything's prepped? Good. Let's get into the real action...
The Method — Step by Step
- Prep the crust. Preheat your oven to 325°F (165°C). In a medium bowl, combine the graham cracker crumbs, 1/2 cup melted unsalted butter, and a pinch of salt. Press the mixture firmly into the bottom of a 9‑inch springform pan, making sure the edges are even. Bake for 8 minutes, then set aside to cool while you work on the filling. Kitchen Hack: Use the bottom of a measuring cup to press the crust down; it creates a perfectly level base.
- Blend the cheesecake base. In a large mixing bowl, beat the softened cream cheese until smooth—no lumps allowed. Add the granulated sugar and brown sugar, then continue beating until the mixture is light and fluffy, about 2 minutes. Scrape the sides of the bowl frequently; this prevents a gritty texture.
- Incorporate the wet ingredients. Add the sour cream, one egg at a time, beating on low speed after each addition. Once all three eggs are incorporated, stir in the 1 teaspoon of cinnamon. The batter should be glossy and slightly thick, not runny.
- Prepare the apple layer. Peel, core, and thinly slice the Granny Smith apples—about 1/8‑inch slices work best. Toss the slices with the remaining 1 teaspoon of cinnamon, a drizzle of melted butter, and a sprinkle of brown sugar. The apples should glisten, signaling that they’re ready for the oven.
- Assemble the cheesecake. Pour half of the cheesecake batter over the pre‑baked crust, spreading it evenly. Layer the seasoned apple slices on top, arranging them in a single, overlapping circle. Finish by pouring the remaining cheesecake batter over the apples, smoothing the surface with a spatula. Watch Out: Do not over‑mix the batter after adding the eggs; too much air will cause cracks during baking.
- Make the crisp topping. In a small saucepan, melt the 1/4 cup butter over medium heat. Stir in the rolled oats and a tablespoon of brown sugar, cooking until the oats turn a light golden brown and emit a nutty aroma—about 3 minutes. Remove from heat and let cool slightly.
- Apply the topping. Evenly sprinkle the oat‑butter mixture over the surface of the cheesecake. Use the back of a spoon to press it down lightly, ensuring good contact with the batter. This creates a seal that will keep the topping crisp.
- Bake the masterpiece. Place the springform pan on a baking sheet and bake at 325°F (165°C) for 45‑50 minutes. The edges should be set and lightly golden, while the center still has a gentle wobble when you jiggle the pan. This wobble is a sign of a perfectly creamy interior.
- Cool and chill. Turn off the oven, crack the door open, and let the cheesecake sit for 1 hour—this gradual cooling prevents cracking. Afterward, run a thin knife around the edge to release the springform, then refrigerate for at least 4 hours or overnight. Kitchen Hack: Place the pan on a wire rack while cooling; the airflow helps the top stay crisp.
That's it — you did it. But hold on, I've got a few more tricks that'll take this to another level...
Insider Tricks for Flawless Results
The Temperature Rule Nobody Follows
Never bake a cheesecake at a scorching 350°F unless you’re using a water bath. The gentle 325°F heat allows the batter to set slowly, preventing the dreaded cracks that make you look like a rookie. I once tried a hotter oven for speed, and the result was a jagged, uneven surface that looked like a volcanic eruption. Trust the low‑and‑slow method, and you’ll get a flawless dome every time.
Why Your Nose Knows Best
When the apple slices start to caramelize, you’ll notice a sweet, buttery aroma that fills the kitchen. That scent is your cue that the apples are ready to be layered. If you rely solely on timing, you might miss that perfect caramelization point. Follow your nose; it’s the most reliable timer in the kitchen.
The 5‑Minute Rest That Changes Everything
After removing the cheesecake from the oven, let it rest on the counter for exactly five minutes before moving it to the fridge. This short pause lets the interior settle, making it easier to slice later without crumbling. I’ve seen novices skip this step and end up with a mushy mess—don’t be that person.
Butter‑Oil Emulsion for the Crisp
When you melt the butter for the topping, add a splash of neutral oil (like grapeseed) before mixing in the oats. The oil creates a finer emulsion, which results in a more even, crunchy crust that stays crisp even after refrigeration.
The Secret of the Springform Release
Before you start, line the bottom of your springform pan with parchment paper and lightly oil the sides. This tiny preparation saves you from a heartbreaking moment when the cheesecake sticks and the top slides off like a pancake. I’ve seen many a perfect cheesecake ruined by a stubborn pan—this hack eliminates that drama.
Creative Twists and Variations
This recipe is a playground. Here are some of my favorite ways to switch things up:
Caramel Apple Swirl
Before adding the apple layer, drizzle a tablespoon of store‑bought caramel sauce over the sliced apples and give it a gentle swirl with a skewer. The caramel adds a buttery depth that pairs beautifully with the cinnamon, and it’s a hit with kids who love extra sweetness.
Maple‑Pecan Crunch
Swap half of the rolled oats for chopped toasted pecans and replace the brown sugar in the topping with pure maple syrup. The nutty crunch and maple’s caramel notes transform the dessert into a quintessential fall treat, perfect for Thanksgiving.
Cranberry‑Orange Zing
Add ½ cup dried cranberries to the apple mixture and a teaspoon of orange zest to the cheesecake batter. The tart cranberries brighten the flavor, while the orange zest adds a citrus spark that cuts through the richness.
Chocolate‑Espresso Infusion
Stir a tablespoon of finely ground espresso and ¼ cup of dark cocoa nibs into the cheesecake batter. The coffee‑chocolate combo gives an adult‑only twist that’s perfect for a cozy night in.
Gluten‑Free Friendly
Replace the graham cracker crumbs with a blend of gluten‑free cookie crumbs and use certified gluten‑free rolled oats. The texture stays the same, and you won’t miss the gluten at all—everyone can indulge.
Storing and Bringing It Back to Life
Fridge Storage
Cover the cheesecake loosely with aluminum foil or a cake dome and store it in the refrigerator. It will keep fresh for up to 5 days. For optimal texture, let it sit at room temperature for 10‑15 minutes before serving.
Freezer Friendly
Slice the cheesecake into wedges, wrap each piece tightly in plastic wrap, then place them in a freezer‑safe bag. The cheesecake freezes beautifully for up to 2 months. When you’re ready to enjoy, transfer a slice to the fridge overnight.
Best Reheating Method
To revive that crisp topping, preheat your oven to 350°F (175°C), place the slice on a parchment‑lined baking sheet, and add a splash of water (about a teaspoon) around the edges. The steam will soften the cheesecake while the top re‑crispes in about 8‑10 minutes. This trick restores the original contrast of textures.