I burned three batches of so-called "healthy" chocolate baked oats before I finally cracked the code. The first one emerged from my oven looking like a sad, dry chocolate brick that could have doubled as a doorstop. The second attempt? Let's just say my roommate still brings up "the great chocolate volcano incident of 2023" whenever I mention baking. But the third time—oh, the third time—something magical happened. The aroma that wafted through my kitchen was so intoxicating that my neighbor knocked on my door asking if I was running a secret bakery.
Picture this: It's 6 AM on a frigid Tuesday morning, and you're standing in your kitchen wearing mismatched socks, desperately needing something that tastes like dessert but won't send you into a sugar coma before your first Zoom call. You want chocolate—no, you need chocolate—but you also need to adult properly. These fudgy chocolate baked oats are basically a warm hug from the inside out, a breakfast that tricks your brain into thinking you're being decadent while secretly fueling you with fiber, protein, and all the good stuff that keeps you humming until lunch.
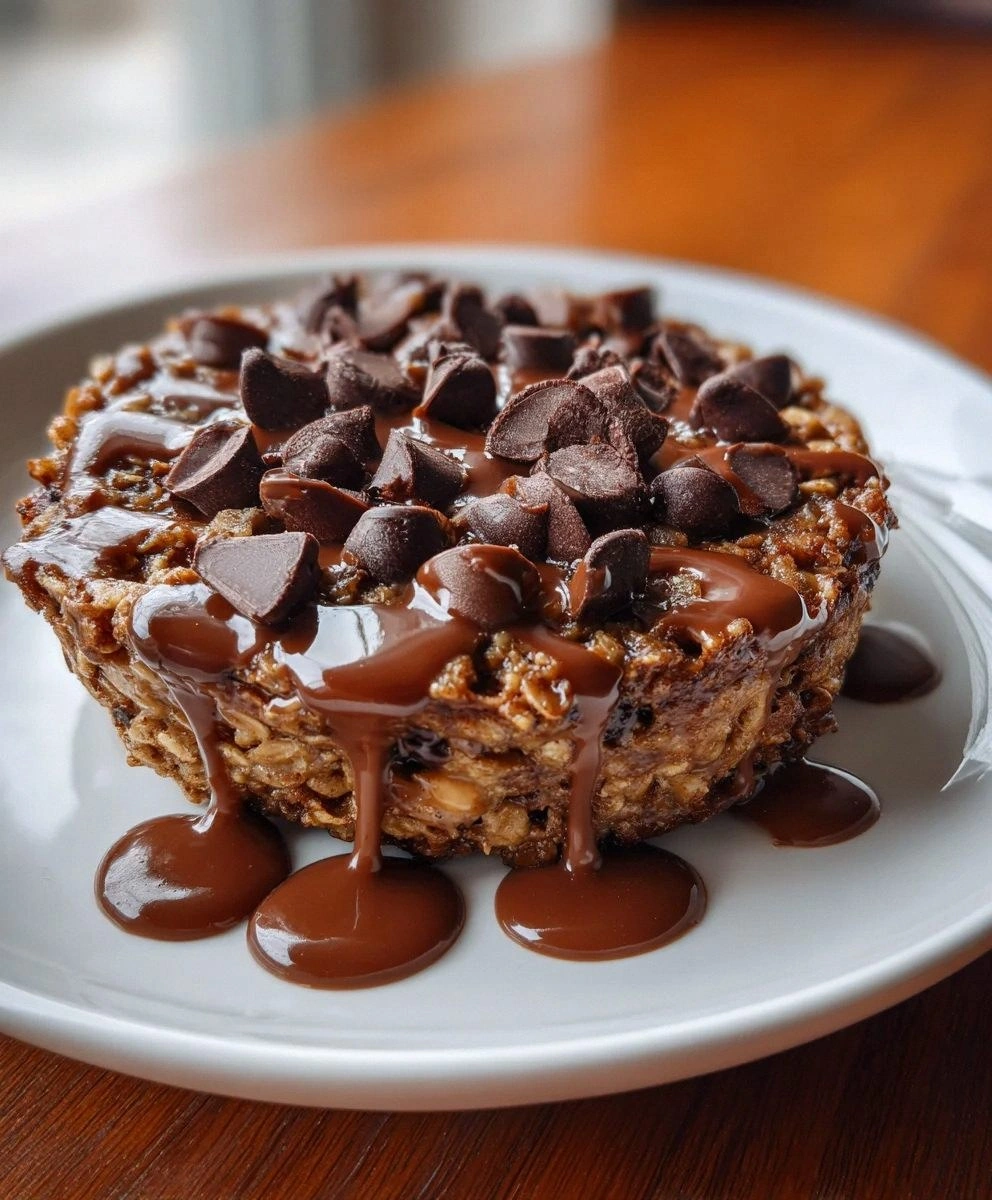
What makes this version different from every other chocolate baked oats recipe cluttering the internet? I'm glad you asked. Most recipes get this completely wrong—they either taste like bitter cocoa sadness or they're so sickeningly sweet you might as well eat actual cake for breakfast. This one hits that elusive sweet spot where rich, fudgy chocolate meets wholesome nutrition, creating something that tastes like it should be illegal for breakfast but absolutely isn't. The texture is what dreams are made of: crispy edges that shatter like thin ice, revealing a molten center that flows like liquid velvet.
Stay with me here—this is worth it. The secret lies in a technique that seems backwards until you try it, plus an ingredient combination that creates chocolate magic through science, not sorcery. By the time you pull this from your oven and that first spoonful hits your tongue, you'll understand why I ate half the batch standing at my kitchen counter at 7 AM, cold coffee forgotten, morning routine abandoned, completely lost in chocolate bliss. Let me walk you through every single step—by the end, you'll wonder how you ever made it any other way.
What Makes This Version Stand Out
Intense Chocolate Flavor: This isn't your average "hint of cocoa" situation. We're talking deep, dark, fudgy chocolate that punches through with every bite. The combination of Dutch-processed cocoa and espresso powder creates a complexity that makes chocolate snobs weep with joy. It's like the difference between instant coffee and a perfectly pulled espresso shot—same family, entirely different universe.
Pudding-Like Center: While other recipes deliver dry, cakey oats that stick to your teeth, this version stays gloriously moist and almost custard-like in the middle. The edges get those coveted crispy bits while the center remains spoon-bendingly soft. It's the textural equivalent of finding the perfect avocado—creamy, rich, and completely satisfying.
Protein-Packed Powerhouse: Each serving delivers a whopping 25 grams of plant-based protein thanks to the clever combination of soy milk, nut butter, and oats. This isn't just chocolate fluff masquerading as breakfast—it's legitimate fuel that keeps you full for hours. I dare you to taste this and not go back for seconds, but good luck finishing the whole pan solo.
One-Bowl Wonder: Everything mixes in a single bowl, meaning fewer dishes and less cleanup time between you and chocolate nirvana. Most recipes make you dirty multiple bowls, blenders, and utensils like some kind of kitchen obstacle course. This streamlined approach gets you from craving to satisfaction in record time.
Make-Ahead Magic: Mix everything the night before, pop it in the fridge, and bake fresh in the morning. The flavors actually deepen overnight, creating an even more intense chocolate experience. Picture yourself pulling this out of the oven, the whole kitchen smelling incredible, while everyone else is eating sad desk cereal.
Crowd-Pleasing Flexibility: Serve it warm with a scoop of cold yogurt, or chill it completely for a brownie-like texture that'll fool even dessert purists. Kids think it's cake, adults appreciate the nutrition, and everyone wins. I've brought this to potlucks where people demanded the recipe before they'd even finished chewing.
Alright, let's break down exactly what goes into this masterpiece...
Inside the Ingredient List
The Flavor Foundation
Unsweetened soy milk forms our creamy base with a protein punch that makes these oats genuinely filling. Unlike watery almond milk, soy provides body and richness that transforms the final texture from meh to magnificent. If you've ever struggled with baked oats that turn out disappointingly dry, you're not alone—and I've got the fix. The natural creaminess of soy milk creates a custard-like environment that keeps everything moist and luxurious.
Maple syrup brings more than just sweetness—it's a flavor bomb that adds caramel notes and complexity white sugar could never achieve. The key is using real maple syrup, not the corn syrup imposters lining most grocery shelves. That amber liquid carries trace minerals and a depth that makes the chocolate taste more chocolatey through some kind of delicious food science magic.
Vanilla extract might seem optional, but leaving it out is like forgetting to salt your pasta water—technically fine, culinarily criminal. A generous splash rounds all the sharp edges, creating harmony between the bitter cocoa and sweet maple. The alcohol cooks off, leaving behind warm, floral notes that make people ask "what's that amazing smell?" before they've even tasted a bite.
The Chocolate Dream Team
Dutch-processed cocoa powder is the dark horse hero of this recipe. Unlike natural cocoa, Dutch-processed has been treated with an alkalizing agent that tames acidity and creates a smoother, more mellow chocolate flavor. This is what gives our oats that sophisticated, bakery-quality chocolate taste rather than the harsh, almost metallic edge cheap cocoa can deliver. If you've been using whatever cocoa was on sale and wondering why your chocolate baked goods taste flat, this is your moment of enlightenment.
Dairy-free chocolate chips are the molten pockets of joy that make each spoonful exciting. They melt during baking, creating rivers of chocolate that flow through the oats like delicious geological formations. Use mini chips for more even distribution, or go wild with chunks if you want dramatic chocolate pulls for your Instagram stories. The chips on top stay intact, providing textural contrast against the melty ones inside.
Espresso powder is the ninja ingredient that makes chocolate taste more like chocolate without announcing itself as coffee. Just a quarter teaspoon transforms the entire flavor profile, adding depth and complexity that makes people say "wow, this tastes so... chocolatey!" It's like turning the chocolate flavor dial up to eleven without anyone being able to identify why.
The Texture Makers
Gluten-free rolled oats are the backbone that transforms this from chocolate pudding to actual breakfast. Quick oats turn to mush, steel-cut stay too chewy, but rolled oats hit that perfect middle ground after baking. They absorb liquid while maintaining enough integrity to give you something to chew, preventing the dreaded baby-food texture that plagues lesser recipes.
Ground flaxseed acts as our binding agent while sneaking in omega-3s and fiber like a nutritional ninja. When mixed with liquid, it creates a gel that helps everything hold together without eggs. This isn't just for vegans—flax adds a subtle nuttiness that complements the chocolate beautifully while making the texture more cohesive and less crumbly.
Peanut butter or almond butter contributes healthy fats that keep you satisfied for hours while creating richness that makes this feel indulgent rather than virtuous. The nut butter melts during baking, distributing itself throughout and creating little pockets of creamy luxury. Choose almond for a more neutral flavor that lets chocolate shine, or peanut if you love that chocolate-peanut butter combo that makes Reese's jealous.
The Science Squad
Baking powder provides just enough lift to keep our oats from becoming dense chocolate cement. Without it, you'd have a chocolate brick; with too much, you'd have chocolate-flavored air. The small amount called for creates perfect balance—enough rise to keep things light but not so much that it becomes cakey and loses that signature oat texture.
Salt might seem counterintuitive in a sweet breakfast, but it's the difference between good and mind-blowing. Just a pinch amplifies all the sweet flavors while balancing the bitterness of the cocoa. Skip it and your chocolate will taste flat and one-dimensional; add it and suddenly every other ingredient tastes more like itself.
Everything's prepped? Good. Let's get into the real action...
The Method — Step by Step
- Start by preheating your oven to 350°F (175°C) and grabbing an 8-inch square baking dish. Here's where most people mess up—they grab whatever pan looks about right and wonder why their timing is off. An 8-inch pan creates the perfect depth for that coveted crispy-edged, pudding-centered texture. Too small and your oats will be undercooked in the middle; too large and you'll lose the fudgy center entirely. Grease it well with coconut oil or cooking spray, getting into all the corners where chocolate likes to cement itself.
- In a large bowl, whisk together the soy milk, maple syrup, nut butter, and vanilla until completely smooth. This is your moment to really blend—those tiny flecks of unmixed nut butter will create weird dense spots if you rush. The mixture should be glossy and unified, like liquid caramel. If your nut butter is particularly thick, microwave it for 10-15 seconds first to loosen it up. Nobody wants to bite into a hard peanut butter nugget when they're expecting chocolate bliss.
- Add the cocoa powder, espresso powder, baking powder, and salt, whisking until no dry pockets remain. The cocoa will want to clump together like it's having a party, so really work it in. This is where your mixture transforms from beige liquid to rich, dark chocolate sauce that looks good enough to drink. Resist the temptation—save it for the final product. The batter should be smooth and thick, coating your whisk like chocolate paint.
- Fold in the oats and ground flaxseed gently, just until everything is moistened. Overmixing activates the starches in the oats and can make your final texture gummy rather than tender. The mixture will seem too wet—this is perfect! Those oats need time to absorb liquid, and the flaxseed will work its binding magic during baking. Let it sit for 5 minutes while you prepare the chocolate chips.
- Reserve 2 tablespoons of chocolate chips for the top and fold the rest into the batter. This ensures even distribution of chocolate throughout, so every bite has that melty surprise. The chips might want to sink to the bottom—don't worry about it too much. During baking, they'll find their equilibrium and create those gorgeous chocolate lava flows we're after.
- Pour the mixture into your prepared pan and spread it evenly. Rap the pan on the counter a few times to release any air bubbles and help the top level out. Sprinkle the reserved chocolate chips over the top in a pattern that makes you happy—they'll stay visible and create those Instagram-worthy chocolate pools. Don't press them in; let them rest on top like chocolate islands.
- Bake for 25-30 minutes, but here's the crucial part: start checking at 20 minutes. Every oven is different, and chocolate desserts can go from perfect to overbaked in minutes. You're looking for the edges to be set and slightly pulling away from the pan, while the center still has a gentle jiggle. That jiggle is your friend—it means fudgy centers are in your future.
- Remove from oven and let cool for exactly 10 minutes before serving. I know, I know—you want to dive in immediately. But this rest allows the center to finish setting through carryover cooking while keeping that pudding-like texture. Plus, molten chocolate chips are basically napalm at this point, and your tongue will thank you for waiting.
- Serve warm with a cold scoop of yogurt or let cool completely for brownie-like density. The transformation from warm to cool is magical—warm gives you molten chocolate flows, while cooled creates a texture so dense and fudgy you'll swear it's actual chocolate cake. Either way, prepare for people to ask if you secretly went to pastry school.
That's it—you did it. But hold on, I've got a few more tricks that'll take this to another level...
Insider Tricks for Flawless Results
The Temperature Rule Nobody Follows
Room temperature ingredients aren't just chef snobbery—they're the difference between smooth batter and chocolate curdled mess. Cold nut butter seizes up when it hits liquid, creating stubborn lumps that refuse to blend. Take everything out of the fridge 30 minutes before baking, or be prepared to whisk like your life depends on it. Your future self, standing over a bowl of perfectly smooth batter, will thank you profusely.
Why Your Nose Knows Best
Don't trust the timer blindly—your nose is your most reliable baking tool. When these oats are perfectly done, your kitchen will fill with an intense chocolate aroma that's almost dizzying. If you can smell chocolate from the next room, check them immediately. That smell means the chocolate is properly caramelizing, creating those complex flavors that make people close their eyes involuntarily when they take a bite.
The 5-Minute Rest That Changes Everything
The difference between amateur and professional results often comes down to patience. Those five minutes of resting time allow the starches to fully hydrate and the texture to set properly. Skip it and you'll have chocolate soup that falls apart when you try to serve it. Wait it out and you'll get clean cuts and a texture that holds together while staying fudgy. A friend tried rushing this step once—let's just say it didn't end well.
The Stir-Once Rule
Once you add the oats, stir exactly enough to combine and not one stroke more. Overmixing develops gluten (even in gluten-free oats) and creates a tough, chewy texture that ruins the fudgy experience. The batter should look slightly lumpy and rustic—perfection through imperfection. Think of it like folding clouds into chocolate; gentle and brief.
The Pan-Size Secret
Don't have an 8-inch pan? Use a 9-inch and reduce baking time by 5-7 minutes, or use a 7-inch and add 5-7 minutes. The key is maintaining the right depth for that perfect edge-to-center ratio. Too shallow and you lose the fudgy center; too deep and the edges over-brown before the middle cooks. It's like Goldilocks and the three bears, but with chocolate instead of porridge.
Creative Twists and Variations
This recipe is a playground. Here are some of my favorite ways to switch things up:
The Mexican Hot Chocolate Edition
Add 1/2 teaspoon cinnamon, 1/4 teaspoon cayenne pepper, and swap the vanilla for almond extract. The warmth from the spices creates a subtle heat that builds slowly, making each bite more addictive than the last. Top with sliced almonds for crunch and serve with cinnamon-spiked yogurt. It's like drinking Mexican hot chocolate, but you can eat it with a spoon and call it breakfast without society judging you.
The Raspberry Ripple Revolution
Drop spoonfuls of raspberry jam on top before baking and swirl with a toothpick for a bakery-worthy presentation. The tart berries cut through the rich chocolate like a fruit ninja, creating those gorgeous red ribbons that make people think you're a pastry wizard. Use good quality jam—cheap stuff just tastes like red sugar water and will disappoint everyone, especially yourself.
The Salted Caramel Swirl
Drizzle two tablespoons of vegan caramel sauce over the top before baking, then finish with flaky sea salt when it comes out. The caramel sinks and creates pockets of gooey sweetness that contrast beautifully with the dark chocolate. It's like someone took your favorite candy bar and reimagined it as socially acceptable breakfast food.
The Orange Chocolate Zinger
Add the zest of one orange and substitute orange extract for half the vanilla. This creates a sophisticated flavor profile reminiscent of those fancy chocolate oranges, but in breakfast form. The citrus oils brighten the chocolate and make it taste more expensive than it is. Serve with orange segments for a breakfast that makes you feel like you're dining in a European café.
The Nutella-Style Dream
Use hazelnut butter instead of peanut/almond, add 1/2 teaspoon hazelnut extract, and fold in chopped hazelnuts for crunch. This variation tastes exactly like Nutella but without the guilt or the weird palm oil aftertaste. The hazelnut flavor marries with chocolate so perfectly that you'll wonder why every chocolate dessert doesn't include hazelnuts. Warning: this version has been known to cause spontaneous happy dances.
The Mocha Madness
Replace 1/4 cup of the soy milk with strong cold brew coffee and double the espresso powder. This creates a mocha flavor that's subtle enough for breakfast but intense enough for coffee lovers. The coffee enhances the chocolate while adding its own bitter complexity. Serve with coffee on the side for a meta breakfast experience that'll have you buzzing (in the best way).
Storing and Bringing It Back to Life
Fridge Storage
Let the baked oats cool completely, then cut into squares and store in an airtight container in the fridge for up to 5 days. Layer parchment paper between squares to prevent them from becoming a chocolate blob. The texture actually improves after a day in the fridge—the flavors meld and deepen like a fine wine, but chocolatey and breakfast-appropriate. They'll firm up when cold, creating a texture somewhere between cake and brownie.
Freezer Friendly
Wrap individual squares tightly in plastic wrap, then foil, and freeze for up to 3 months. This is meal prep at its finest—make a double batch on Sunday, freeze half, and enjoy chocolate breakfast all month. Thaw overnight in the fridge or microwave from frozen for 45-60 seconds. Pro tip: microwave for 30 seconds, then let it sit for 30 seconds—the heat distributes more evenly this way.
Best Reheating Method
Add a tiny splash of water before reheating—it steams back to perfection and prevents the dreaded chocolate desert dryness. Microwave for 30-45 seconds or warm in a 300°F oven for 10 minutes. For the ultimate experience, reheat in the oven until warm through, then top with cold yogurt or milk. The temperature contrast makes it feel like you just pulled it from the oven, even three days later.