I was in the middle of a Sunday afternoon when my roommate dared me to bake something that would make her forget about the pizza she was planning for dinner. She said, “If you can pull off a pineapple upside‑down cake that actually looks like it belongs in a bakery, I’ll never order takeout again.” I laughed, but the challenge lit a fire under me that turned a simple pantry raid into an epic culinary adventure. The first time I tried a classic upside‑down cake, the caramel sank into the batter like a soggy sponge, and the pineapple turned into a mushy mess that clung to the fork. That disaster still haunts my dreams, and it’s the exact reason I’m so obsessed with getting this version perfect.
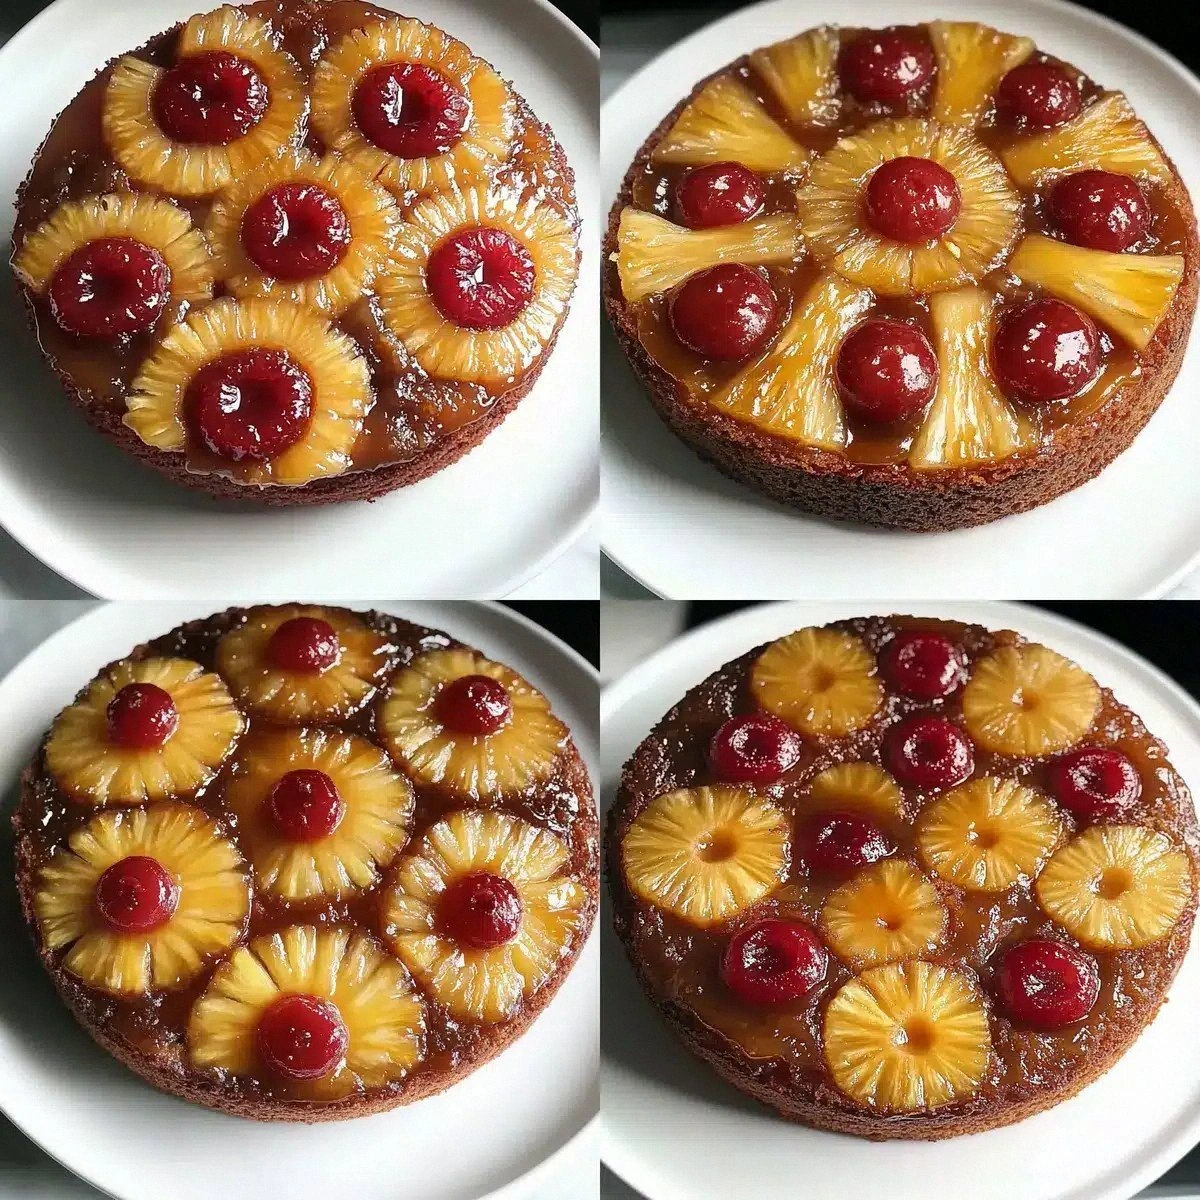
Picture this: a golden‑brown, buttery crust hugging caramelized pineapple rings that sparkle with a hint of cherry red, all baked in a seasoned cast‑iron skillet that whispers stories of generations past. The moment you lift the skillet, a cloud of sweet, buttery aroma bursts out, hugging the kitchen like a warm blanket. You can hear the faint sizzle of caramel as it settles, see the glossy glaze catching the light, feel the weight of the heavy skillet in your hands, and taste the perfect balance of tart pineapple and deep, caramel‑kissed brown sugar. It’s a sensory overload that makes you want to hug the oven door.
What sets this version apart is the marriage of technique and ingredient quality. I’m using two types of butter—unsalted for the batter and cold butter for the caramel—so the cake stays moist while the topping gets that crisp, caramelized edge. The secret is the double‑sugar system: dark brown sugar for that molasses‑rich depth, and light brown sugar for a lighter, buttery sweetness that doesn’t overwhelm the pineapple. And the cast‑iron skillet? It distributes heat evenly, giving you a uniformly golden top and a slightly crunchy edge that shatters like thin ice when you cut into it.
I’m also throwing in a curveball: a splash of vanilla extract that sneaks into the batter, turning the whole thing into a fragrant, buttery dream. Most recipes skip this, but trust me, it makes a world of difference. I dare you to taste this and not go back for seconds. Let me walk you through every single step — by the end, you’ll wonder how you ever made it any other way.
What Makes This Version Stand Out
- Flavor Explosion: The combination of dark and light brown sugars creates a layered caramel that’s both deep and bright, while the pineapple adds a natural acidity that cuts through the richness.
- Texture Harmony: A buttery, tender crumb meets a crisp, caramelized topping that offers a satisfying crunch with every bite.
- Simplicity: Only twelve ingredients, all pantry staples, and a single skillet—no fancy equipment required.
- Uniqueness: Using both unsalted and cold butter gives the cake a moist interior and a glossy, caramelized exterior that most recipes miss.
- Crowd Reaction: This cake has a built‑in “wow” factor; guests will be asking for the recipe before the first slice disappears.
- Ingredient Quality: Choosing a good‑quality pineapple and fresh maraschino cherries elevates the dish from everyday to unforgettable.
- Cooking Method: The cast‑iron skillet retains heat, ensuring an even bake and a caramel that doesn’t burn.
- Make‑Ahead Potential: The cake can be assembled ahead of time and baked just before serving, perfect for last‑minute gatherings.
Inside the Ingredient List
The Flavor Base
The duo of dark brown sugar (½ cup) and light brown sugar (1 cup) is the heart of this cake. Dark brown sugar brings a molasses‑rich depth that feels like a warm hug on a cold day, while light brown sugar adds a buttery sweetness that lets the pineapple shine. If you skip either, you’ll lose that intricate caramel dance and end up with a one‑note cake. Want a twist? Swap half the light brown sugar for coconut sugar for a subtle tropical hint.
The Texture Crew
Butter is the star here, but not just any butter. Four tablespoons of unsalted butter melt into the batter, keeping it tender, while another four tablespoons of cold butter melt into the caramel, creating those coveted glossy, crackly edges. Using cold butter for the topping ensures the sugar doesn’t dissolve too quickly, preserving those caramelized shards. If you only have salted butter, reduce the added salt to a pinch to avoid an overly salty finish.
The Unexpected Star
Maraschino cherries are more than a garnish; they add a burst of sweet‑tart contrast that balances the caramel. Their bright red color also makes the cake look like a tropical sunset. If you’re feeling adventurous, try halved fresh cherries or even a few dried cranberries for a tangier note. Skipping them isn’t fatal, but you’ll lose that pop of color and flavor complexity.
The Final Flourish
All‑purpose flour (1½ cups), baking powder (1½ tsp), and salt (½ tsp) create the structural backbone. The flour provides the crumb, the baking powder gives lift, and the salt amplifies every flavor note. If you’re gluten‑free, substitute a 1:1 blend of rice flour, tapioca starch, and potato starch, but expect a slightly different texture. Always sift the flour and baking powder together to avoid lumps that could turn your cake into a bumpy road.
Everything's prepped? Good. Let's get into the real action...
The Method — Step by Step
Preheat your oven to 350°F (175°C). While the oven warms up, place a 10‑inch cast‑iron skillet on the stovetop over medium heat. This step is crucial because a hot skillet jump‑starts the caramelization, ensuring those glossy edges we all crave. Let the skillet heat for about two minutes; you should hear a faint hum, like a low‑key drumbeat, indicating it’s ready.
Drop the four tablespoons of cold butter into the hot skillet. As it melts, sprinkle the dark brown sugar (½ cup) evenly over the butter. Stir gently with a wooden spoon; the mixture will begin to bubble and turn a deep amber. That sizzle when it hits the pan? Absolute perfection.
Kitchen Hack: If the caramel looks too thick, add a splash (about 1 tbsp) of water to loosen it without losing flavor.Arrange the pineapple slices (one can, drained) in a single layer over the caramel, pressing them gently so they hug the pan. Scatter maraschino cherries in the gaps; they’ll burst with color as the cake bakes. Let the fruit sit for a minute, allowing it to soak up the caramel. This is where the magic starts— the fruit absorbs the buttery sweetness, turning each slice into a miniature caramel island.
In a separate bowl, whisk together the flour (1½ cups), baking powder (1½ tsp), and salt (½ tsp). This dry mixture ensures even distribution of leavening and prevents pockets of flour that could make the cake dense. Sift the mixture twice for extra lightness; think of it as aerating the future crumb.
In a large mixing bowl, beat the four tablespoons of unsalted butter with the light brown sugar (1 cup) until the mixture is pale and fluffy—about three minutes with an electric mixer on medium speed. This step creates a cream base that traps air, giving the cake its tender crumb. Add the eggs one at a time, beating well after each addition; the batter should look glossy and slightly thick.
Stir in the vanilla extract (1 tsp) and then alternately add the dry flour mixture and the buttermilk (1 cup), beginning and ending with the dry ingredients. Mix just until combined; over‑mixing will develop gluten and make the cake tough. The batter should be smooth, with a few small lumps that will disappear during baking.
Now, the grand finale: carefully pour the batter over the fruit in the skillet, spreading it gently with a spatula so it covers the pineapple and cherries evenly. The batter will sink a little, but that’s okay; it will rise as it bakes, lifting the fruit into a beautiful dome.
Watch Out: Do not overfill the skillet; the batter should be about ¾ full to allow room for rising.Slide the skillet into the preheated oven and bake for 30‑35 minutes, or until the top is golden brown and a toothpick inserted into the center comes out clean. Around the 20‑minute mark, you’ll hear a faint crackling sound as the caramel continues to caramelize—listen for that; it’s the sound of success.
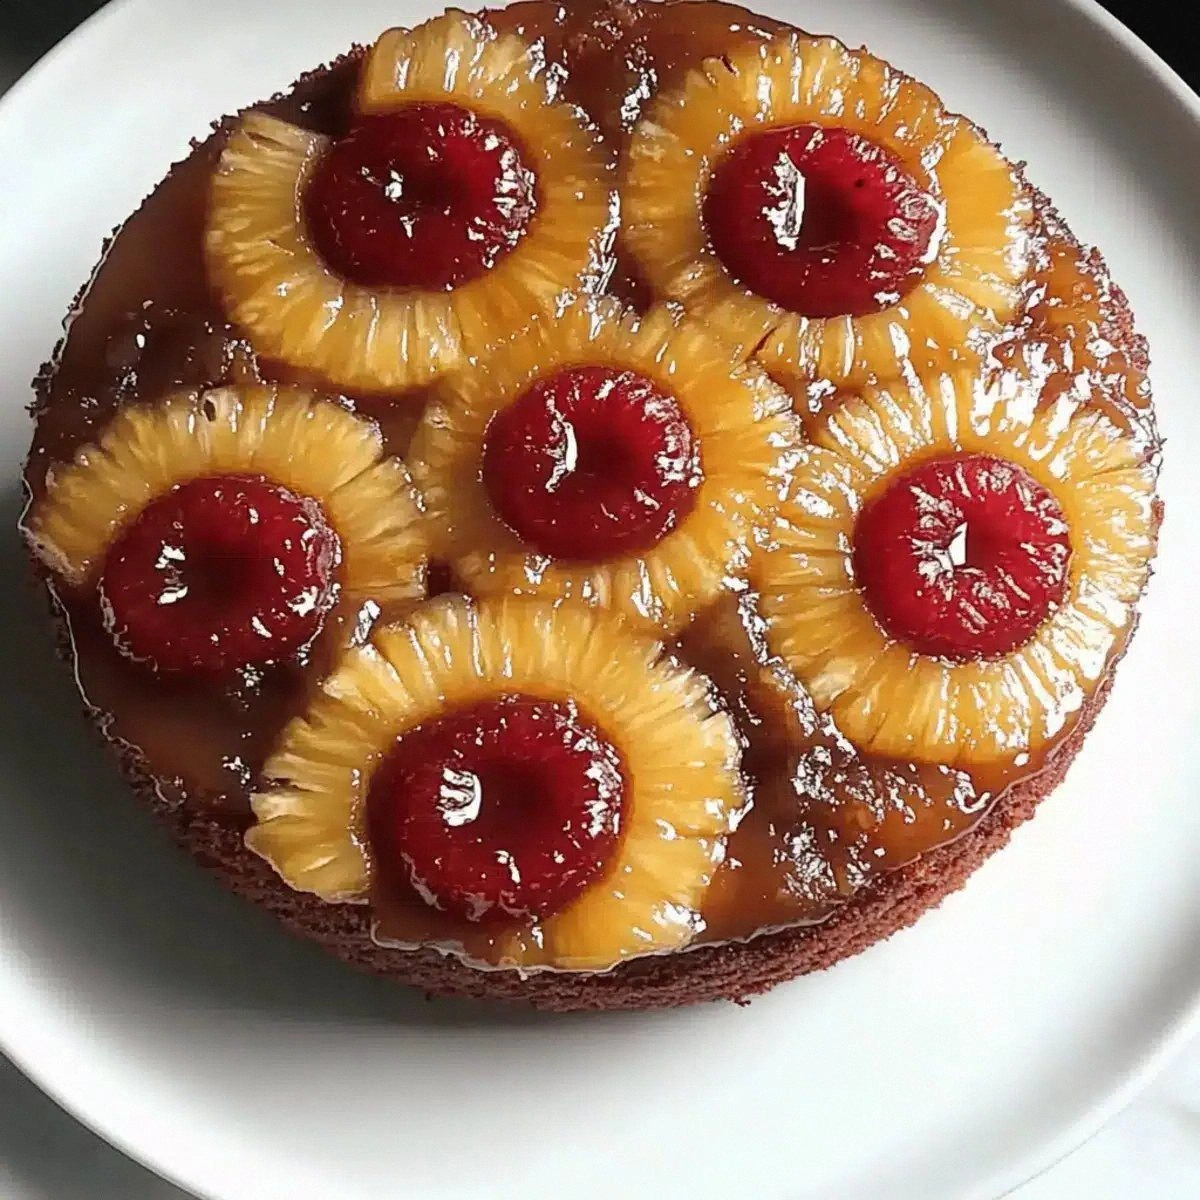
When the timer dings, remove the skillet and let it rest for five minutes. This short pause lets the caramel set slightly, making the flip easier. Place a large serving plate upside‑down over the skillet, then, with a confident flick, invert the cake. The pineapple rings should glisten like jewels, perched atop a buttery, caramel‑kissed cake.
Serve warm, perhaps with a dollop of whipped cream or a scoop of vanilla ice cream. The steam that rises as you cut into it is a sensory snapshot you’ll never forget. That moment? Pure magic. That first bite? A symphony of sweet, tart, buttery, and caramel notes that dance across your palate.
That's it — you did it. But hold on, I've got a few more tricks that'll take this to another level...
Insider Tricks for Flawless Results
The Temperature Rule Nobody Follows
Never bake a cake in a cold skillet. Starting with a hot pan jump‑starts the caramelization, giving you that coveted glossy top. If you’re using a glass dish, preheat the dish in the oven for 5 minutes first. I once tried skipping this step and ended up with a soggy bottom that ruined the whole experience. Trust me, the extra minute of preheating is worth every second.
Why Your Nose Knows Best
The aroma is your best indicator of doneness. Around the 25‑minute mark, you’ll start smelling a buttery, caramel scent that fills the kitchen. If you’re still getting a raw batter smell, give it a few more minutes. Your nose can detect the subtle shift from raw to caramelized long before a toothpick can.
The 5‑Minute Rest That Changes Everything
Letting the cake rest for five minutes after baking allows the caramel to set and the crumb to finish cooking from residual heat. Skipping this rest leads to a runny topping that slides off the plate. I once served the cake immediately and watched the caramel ooze everywhere—messy, but a learning experience.
Cold Butter, Warm Heart
When making the caramel, keep the butter cold until it meets the pan. This ensures the butter emulsifies slowly, creating a glossy, stable caramel. If the butter melts too quickly, the sugar can crystallize, leaving a grainy texture. A quick tip: cut the butter into small cubes and keep it in the fridge until you’re ready to start.
The Flip‑Free Technique
If you’re terrified of flipping a heavy skillet, try the “plate‑and‑slide” method. After baking, place a plate over the skillet, then, with a confident motion, slide the skillet off the stove and invert the cake onto the plate. The caramel will stay glued to the fruit, giving you a picture‑perfect presentation. I’ve seen many novices panic at this step, but with a steady hand, it’s a breeze.
Creative Twists and Variations
This recipe is a playground. Here are some of my favorite ways to switch things up:
Tropical Coconut Breeze
Swap the buttermilk for coconut milk and add a tablespoon of shredded coconut to the batter. The result is a subtly coconut‑infused crumb that pairs beautifully with the pineapple. Garnish with toasted coconut flakes for extra crunch.
Spiced Rum Rum‑Runner
Add a tablespoon of dark rum and a pinch of ground cinnamon to the batter. The rum deepens the caramel flavor, while the cinnamon adds a warm spice note that’s perfect for cooler evenings. Serve with a dollop of rum‑spiked whipped cream.
Berry‑Burst Remix
Replace half of the pineapple with fresh mixed berries (strawberries, blueberries, raspberries). The berries bring a tart pop that contrasts the sweet caramel, creating a vibrant color palette that’s Instagram‑ready.
Nutty Crunch
Stir in a quarter cup of chopped toasted pecans or walnuts into the batter. The nuts add a buttery crunch that complements the caramelized topping, making each bite more complex.
Vegan Velvet
Replace the butter with coconut oil, use almond milk instead of buttermilk, and swap the eggs for a flax‑egg mixture (2 tbsp ground flaxseed + 6 tbsp water). The texture stays moist, and the flavor remains indulgent—proof that you don’t need dairy to achieve decadence.
Storing and Bringing It Back to Life
Fridge Storage
Allow the cake to cool completely, then cover the skillet loosely with aluminum foil or a reusable silicone lid. Store in the refrigerator for up to three days. The caramel may harden a bit; gently reheat in a 300°F oven for 10 minutes before serving.
Freezer Friendly
Wrap the cooled cake tightly in plastic wrap, then place it in a freezer‑safe bag. It will keep for up to two months. To reheat, thaw overnight in the fridge, then bake at 325°F for 15‑20 minutes, adding a splash of water to the caramel layer before reheating to revive its gloss.
Best Reheating Method
For a quick revival, microwave individual slices for 20‑30 seconds, then finish under a broiler for 1 minute to crisp the caramel. Adding a tiny splash of water (about a teaspoon) before microwaving creates steam that restores the cake’s moisture without making it soggy.