I remember the night I almost ruined a Sunday brunch because I tried to make a quick apple crumble that turned into a sticky mess. The apples were perfectly crisp, the sugar was too sweet, and the topping collapsed like a soggy pancake. I stared at the kitchen counter, realizing I had a problem: the classic recipe was missing that secret sauce that turns a simple dessert into a showstopper. So I set out to find the missing ingredient, the technique, and the balance of flavors that would make everyone in the house beg for seconds.
Picture yourself walking into your kitchen, the air already thick with the scent of apples, cinnamon, and butter melting together. The sound of a rolling pin on a wooden board, the gentle hiss of butter melting in a pan, and the faint crackle of sugar caramelizing. The texture of the apples, firm yet yielding, promises a bite that’s both juicy and satisfying. The aroma rises, mingling with the warm, buttery topping that will crisp to a golden perfection. The anticipation builds; you’re about to taste something that feels like home, comfort, and a dash of culinary rebellion all at once.
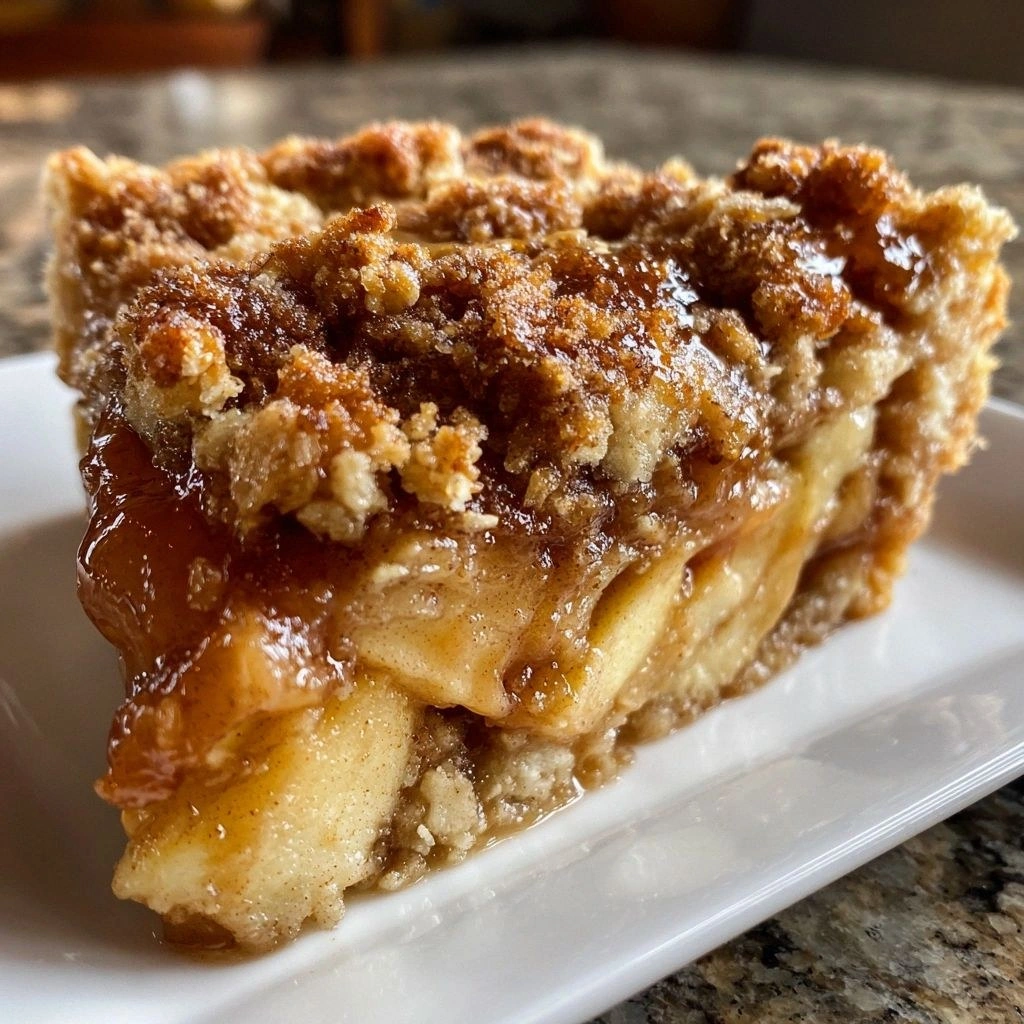
What makes this version of Apple Crisp truly stand out is that I didn’t just throw a handful of ingredients together and hope for the best. I discovered that the combination of a buttery, crunchy topping with a perfectly balanced apple base creates a texture profile that is nothing short of cinematic. The apples aren’t just sweet; they’re layered with a subtle tartness that cuts through the richness of the topping. The topping itself is a harmonious blend of oats, flour, brown sugar, and butter that settles into a crisp, caramelized crust. And the cinnamon? It’s not just sprinkled; it’s infused throughout, creating a fragrant, spicy undertone that lingers on the tongue.
I dare you to taste this and not go back for seconds. This is hands down the best version you'll ever make at home. If you've ever struggled with a soggy crisp or a too-sweet apple filling, you're not alone — and I've got the fix. Most recipes get this completely wrong by either undercooking the apples or overloading the topping with sugar. Here’s what actually works: a measured balance of sweet and tart, a crunchy topping that doesn’t melt, and a subtle spice that ties everything together. Picture yourself pulling this out of the oven, the whole kitchen smelling incredible, and watching the steam rise like a sweet cloud. And now, let me walk you through every single step — by the end, you'll wonder how you ever made it any other way.
What Makes This Version Stand Out
- Flavor: The apples are chosen for their sweet-tart balance, creating depth that lingers on the palate. The brown sugar caramelizes, adding a rich, almost molasses-like sweetness that pairs beautifully with the apples.
- Texture: The topping’s oat and flour blend yields a crunchy, caramelized crust that contrasts perfectly with the soft, juicy apple base.
- Simple Ingredients: Only seven ingredients, all pantry staples, mean you can whip this up on a weekday without hunting for exotic items.
- Unique Twist: A pinch of salt lifts the sweetness, and the use of melted butter instead of cold butter ensures the topping melts into a golden crust.
- Crowd Reaction: Friends who’ve tried other crisp recipes say this version has “the perfect crunch and a flavor that just keeps coming back.”
- Ingredient Quality: Using fresh, firm apples and high-quality brown sugar ensures the best flavor and texture.
- Cooking Method: Baking at a moderate temperature allows the apples to soften without turning to mush, while the topping crisps without burning.
- Make‑Ahead Potential: Assemble the crisp a day ahead, refrigerate, and bake fresh. The flavors meld beautifully, and the topping remains crisp.
Alright, let's break down exactly what goes into this masterpiece...
Inside the Ingredient List
The Flavor Base
Sliced Apples are the heart of this crisp. Use about six medium apples, a mix of Granny Smith and Honeycrisp for depth. The Granny Smith adds tartness that balances the sweetness, while the Honeycrisp keeps the texture crisp. If you skip apples, you lose the juicy, aromatic core that makes this dish a comfort food staple. Choose apples that are firm but not overripe; they’ll hold shape during baking.
The Sweet & Crunch Crew
Brown Sugar is the sweetener that caramelizes into a golden crust. It also adds a subtle molasses undertone that enriches the apple flavor. Rolled Oats provide the crunch and a chewy texture that contrasts the soft apples. All-Purpose Flour binds the topping together; it prevents the oats from falling apart and gives a slightly gluten‑based structure. If you’re gluten‑free, try almond or oat flour; the texture will change slightly but still be delicious.
The Unexpected Star
Ground Cinnamon is the spice that ties everything together. It adds warmth and a fragrant aroma that lingers. Experiment with nutmeg or allspice for a unique twist, but keep the quantity moderate so the cinnamon remains the star. Cinnamon also helps balance the sweetness, preventing the crisp from feeling cloying.
The Final Flourish
Unsalted Butter is the key to a rich, golden topping. Melted butter ensures the topping coats the oats and flour evenly, creating a crisp, caramelized finish. If you’re dairy‑free, coconut oil works well, but the flavor will differ slightly. Salt is just a pinch; it brings out the sweetness and balances the flavors. Without salt, the crisp can taste flat.
Everything's prepped? Good. Let's get into the real action...
The Method — Step by Step
- Preheat the oven. Set it to 375°F (190°C) to allow the apples to soften gently while the topping crisps. This temperature is the sweet spot: hot enough to caramelize sugar but not so hot that the topping burns. While the oven is heating, let me share a quick trick: place a sheet of parchment paper on your baking dish to keep the crisp from sticking, which makes cleanup a breeze.
- Prepare the apples. Wash, core, and slice the apples into bite‑sized pieces. Toss them with a tablespoon of lemon juice to prevent browning. Spread the apples evenly in a 9‑inch pie dish or a 10‑inch baking dish. If you want a deeper flavor, sprinkle a teaspoon of cinnamon over the apples now and gently stir to coat.
- Make the topping. In a large bowl, combine 1 cup rolled oats, 1 cup all‑purpose flour, 1 cup brown sugar, 2 teaspoons ground cinnamon, and ½ teaspoon salt. Mix until evenly distributed. This blend gives the topping its signature crunch and caramelized color. Now, the magic: add ½ cup melted unsalted butter, stirring until the mixture resembles coarse crumbs. The butter should coat the dry ingredients without soaking them.
- Assemble. Sprinkle the topping over the apple layer, covering it completely. Gently press the topping down with the back of a spoon to ensure even coverage. The apples will start to seep out of the gaps, creating those classic little pockets of fruit that melt into the topping as it bakes.
- Bake. Place the dish in the preheated oven and bake for 30–35 minutes. The topping should turn a deep golden brown, and the edges of the apples will start to pull away from the dish. Keep an eye on the top; if it browns too quickly, tent it with foil to prevent burning.
- Check for doneness. The apples should be tender but still hold their shape. Insert a fork into the center; it should glide through with a few moist crumbs. The topping should be crisp and slightly caramelized. The aroma at this point is the scent of baked apples and toasted sugar — absolute perfection.
- Cool and serve. Remove from the oven and let the crisp cool for 10 minutes. This rest allows the flavors to settle and the topping to firm up a bit more. Serve warm, perhaps with a scoop of vanilla ice cream or a drizzle of honey for extra indulgence.
- Enjoy. Taste the first bite: the apple’s juicy sweetness, the buttery, crunchy topping, and that subtle cinnamon kick. If you’re a fan of the crunchy edge, let it sit a few minutes before eating; the topping will firm up even more, giving you that satisfying snap.
That's it — you did it. But hold on, I've got a few more tricks that'll take this to another level...
Insider Tricks for Flawless Results
The Temperature Rule Nobody Follows
Many bakers think a higher temperature will make the topping crisp faster, but the truth is a moderate 375°F is the sweet spot. Too hot, and the sugar will burn; too cool, and the topping will remain doughy. Keep the oven rack in the middle to ensure even heat distribution. If your oven runs hot, lower the temperature by 25°F and bake a few minutes longer.
Why Your Nose Knows Best
Your nose is the ultimate judge of doneness. When the apples are cooked, they release a sweet, buttery scent that mingles with the caramelized sugar. If the aroma feels like a burnt sugar, pull the dish out immediately. Trust your senses; they’ll guide you to the perfect crisp.
The 5‑Minute Rest That Changes Everything
After removing the crisp from the oven, let it rest for five minutes. This short period allows the juices to redistribute and the topping to firm up slightly. It also gives the batter a chance to set, making it easier to slice without the topping falling apart.
Use a Baking Dish That’s Slightly Larger
Choosing a dish that’s a bit wider than the apples spread helps the topping crisp evenly. A shallow dish ensures the sugar caramelizes properly, while a deeper dish can trap steam and make the topping soggy. Aim for a 9‑inch or 10‑inch dish for best results.
The Secret to a Crunchy Topping
If you’re not getting the crunch you want, try adding a tablespoon of cornflakes to the oat mixture. The cornflakes provide extra texture and help create a more pronounced crunch. They also absorb some of the butter, preventing the topping from becoming too soggy.
Creative Twists and Variations
This recipe is a playground. Here are some of my favorite ways to switch things up:
Almond Crunch Variation
Swap the rolled oats for chopped almonds and reduce the flour to half. The result is a nutty, crunchy topping that pairs wonderfully with the apples. The almond flavor adds a subtle earthiness, making the crisp more complex.
Coconut Coconut Delight
Replace the butter with melted coconut oil and sprinkle toasted shredded coconut on top of the topping. This tropical twist brings a subtle coconut flavor that complements the apples. The coconut also adds a chewy texture to the topping.
Spiced Apple Crisp
Add a pinch of ground ginger and a dash of nutmeg to the topping. The warm spices give the crisp a deeper, more aromatic profile. This variation is perfect for those who love a hint of spice in their desserts.
Berry Apple Fusion
Stir in a cup of fresh blueberries or raspberries with the sliced apples. The berries add a burst of color and a tart counterpoint to the apple sweetness. The result is a vibrant, fruit‑laden crisp.
Maple-Infused Crisp
Drizzle a tablespoon of pure maple syrup over the apple layer before baking. The maple adds a subtle sweetness and a hint of caramel flavor. This variation is especially delightful during the fall when maple syrup is at its peak.
Storing and Bringing It Back to Life
Fridge Storage
Cool the crisp completely, then cover tightly with plastic wrap or aluminum foil. Store in the refrigerator for up to 3 days. When ready to serve, reheat in a preheated oven at 350°F for 10 minutes or until warmed through.
Freezer Friendly
Wrap the cooled crisp in plastic wrap, then place it in a freezer bag. Freeze for up to 2 months. To reheat, thaw overnight in the refrigerator, then bake at 350°F for 15 minutes. The topping will regain its crispness.
Best Reheating Method
Add a splash of water or apple juice to the dish before reheating to create steam, which helps maintain moisture and prevent the topping from becoming dry. Reheat in a microwave for 30 seconds or until hot, then finish in the oven for a crisp finish.