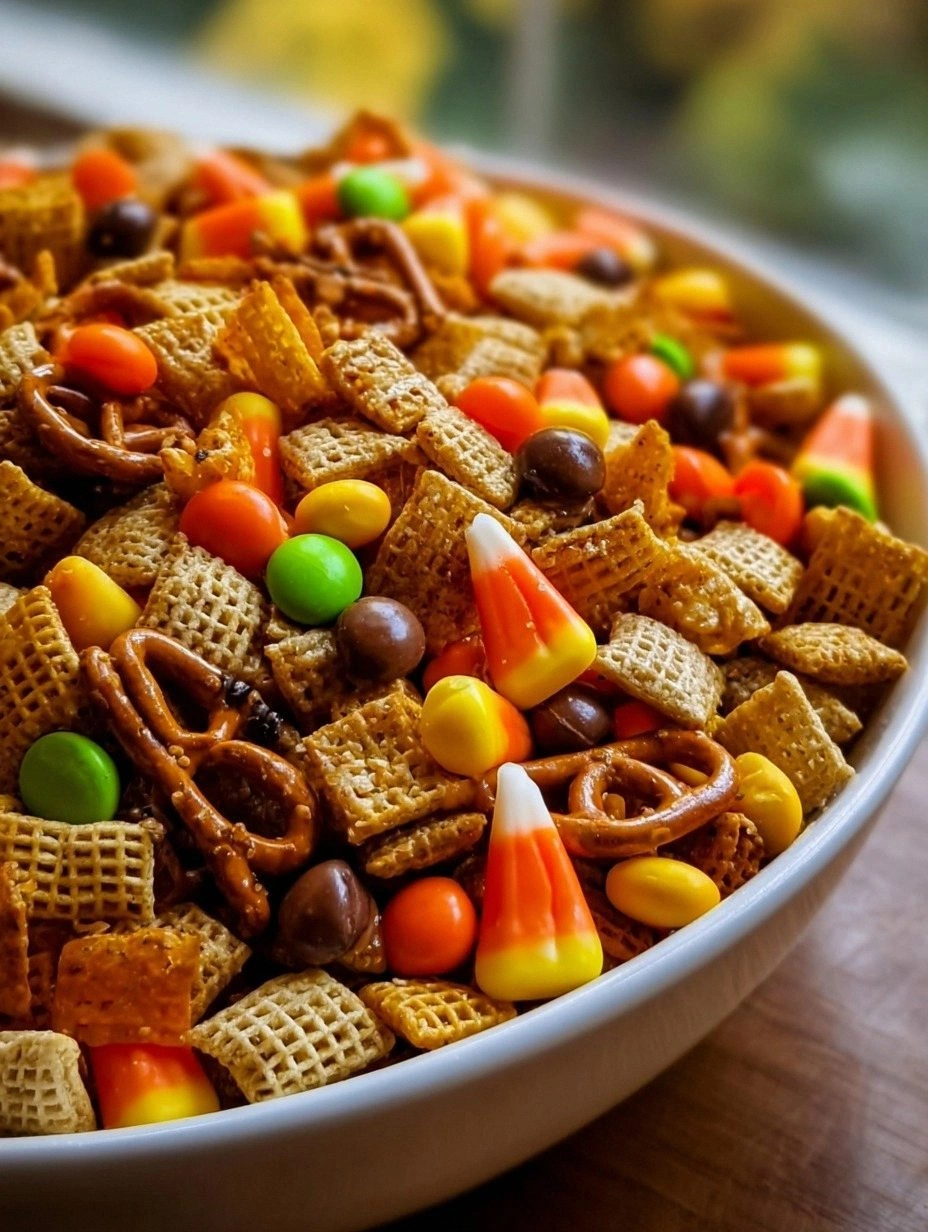
Picture this: it’s a crisp October evening, the wind is howling like a pack of wolves, and you’re standing in your kitchen, surrounded by the faint glow of orange candles flickering on the countertop. You’ve just survived the dreaded “pumpkin spice latte” overload, and your friends are begging for something that actually feels like a party in a bowl. I was in that exact moment, frantically rummaging through pantry shelves, when I realized I had a mountain of Chex cereal, a bag of pretzels, and a stash of candy that screamed Halloween. I tossed a daring challenge at myself – could I create a Chex mix that hits every taste bud with a punch of sweet, a kiss of salty, and a whisper of spooky? The answer? Absolutely, and it’s hands down the best version you’ll ever make at home.
The moment the butter hit the pan, the kitchen filled with a caramelized perfume that made my heart race faster than a kid on a sugar rush. I could hear the faint crackle as the brown sugar dissolved, a sound that promised crunch and depth. My fingertips tingled from the heat, and the air felt thick with anticipation, like waiting for the first howl of a midnight howl. When the first handful of corn Chex hit the bubbling glaze, they sizzled like fireworks, each piece coating itself in a glossy, amber sheen that seemed to glow from within. The texture was a perfect marriage of airy cereal and buttery crunch, and I could already picture the collective gasp of my friends as they dug in.
What truly sets this mix apart is the secret weapon I slipped in – a modest splash of vanilla and a pinch of cinnamon that dance behind the dominant sweet‑and‑salty notes, adding an undercurrent of warmth that lingers long after the last bite. Most recipes get the sweet‑salty balance wrong, either drowning the mix in syrup or leaving it bland and flat. I dared to add chocolate chips and candy corn right at the end, ensuring they stay soft and melty, not melted into a gooey mess. I’ll be honest — I ate half the batch before anyone else got a chance to try it, and that was the only mistake I made.
Let me walk you through every single step — by the end, you’ll wonder how you ever made Chex mix any other way. Okay, ready for the game‑changer? This next part? Pure magic. Stay with me here — this is worth it.
What Makes This Version Stand Out
- Flavor Explosion: The blend of buttery glaze, honey, and a dash of soy sauce creates a sweet‑salty harmony that hits the palate like a fireworks display.
- Texture Symphony: Crispy Chex, pretzel twists, and crunchy nuts mingle with soft, melt‑in‑your‑mouth chocolate chips for a multi‑layered bite.
- Simplicity Meets Sophistication: Fewer than ten pantry staples are needed, yet the result feels like a gourmet snack crafted by a culinary wizard.
- Unexpected Twists: A whisper of cinnamon and vanilla adds depth, while candy corn and orange sprinkles bring the festive flair.
- Crowd‑Pleaser Factor: Even the pickiest eaters rave, and the mix stays fresh for days, making it perfect for parties, potlucks, or midnight cravings.
- Ingredient Quality: Using real butter and high‑quality chocolate elevates the mix from ordinary to extraordinary.
- One‑Pan Perfection: Everything bakes together in a single sheet, cutting cleanup time in half and ensuring even coating.
- Make‑Ahead Magic: Store it airtight, and you’ve got a ready‑to‑go snack that tastes just as good a week later.
Inside the Ingredient List
The Flavor Base
Butter (½ cup) is the golden foundation, melting into a glossy river that binds every piece together. If you substitute with margarine, you’ll lose the rich, nutty undertones that make the glaze sing. I recommend using unsalted, real‑cream butter for maximum flavor. Brown sugar (½ cup) brings deep caramel notes, and its molasses content adds a subtle earthiness that balances the sweetness. When the sugar caramelizes, it creates that irresistible crunch that shatters like thin ice under your teeth. Honey (¼ cup) contributes a floral brightness and helps the glaze coat each morsel evenly; if you’re allergic, agave syrup works just as well.
The Texture Crew
Corn Chex (6 cups), Rice Chex (6 cups), and Wheat Chex (6 cups) form the airy backbone of the mix, each offering a distinct bite – corn Chex is buttery, rice Chex is light, and wheat Chex adds a hearty chew. Pretzel sticks (2 cups) and mini pretzels (2 cups) inject salty crunch, and they’re the reason your guests will keep reaching for more. Peanuts (1 cup) and almonds (1 cup) introduce a nutty richness; toasted nuts elevate the flavor profile, while raw nuts can feel flat. Skipping any of these will leave the mix feeling one‑dimensional, so keep them all for that perfect textural orchestra.
The Unexpected Star
Chocolate chips (1 cup) are added at the very end, ensuring they stay soft and gooey rather than melting into the glaze. This surprise melt‑in‑your‑mouth moment is the “wow” factor that turns a simple snack into a decadent treat. Candy corn (1 cup) and orange sprinkles (½ cup) bring the festive Halloween vibe, their sugary crunch contrasting with the savory elements. Pumpkin seeds (½ cup) add an earthy note and a pop of green that looks as good as it tastes. If you’re vegan, swap chocolate chips for dairy‑free dark chocolate and use coconut oil instead of butter.
The Final Flourish
Sea salt (1 tsp) amplifies every flavor, while garlic powder (1 tsp) and onion powder (1 tsp) add a subtle savory depth that you might not expect from a sweet snack. Black pepper (½ tsp) and cinnamon (½ tsp) create a warm, aromatic finish that lingers on the palate. These spices are the secret sauce that most store‑bought mixes lack. If you’re sensitive to spice, reduce the black pepper; if you love heat, a pinch of cayenne can turn this into a fiery delight.
Everything’s prepped? Good. Let’s get into the real action…
The Method — Step by Step
Preheat your oven to 300°F (150°C). While the oven warms, line a large rimmed baking sheet with parchment paper; this prevents sticking and makes cleanup a breeze. I always set a timer for 5 minutes just to make sure the oven is truly at temperature before I start, because a cold oven can cause uneven caramelization. The anticipation builds as the kitchen starts to warm, and you can already sense the magic about to happen.
In a saucepan over medium heat, melt the butter until it foams, then add the brown sugar and honey. Stir constantly; you’ll hear a gentle hiss as the sugar dissolves, and the mixture will turn a deep amber. That sizzle when it hits the pan? Absolute perfection. Once the sugar has fully melted, whisk in the soy sauce, vanilla extract, garlic powder, onion powder, black pepper, cinnamon, and sea salt. Let it bubble for another minute, then remove from heat. This glaze is the heart of the mix, and it should smell like a caramel‑spice dream.
While the glaze cools slightly, combine all the cereals, pretzels, peanuts, almonds, and pumpkin seeds in a massive mixing bowl. Toss them gently to ensure they’re evenly distributed. I dare you to taste this and not go back for seconds; the dry ingredients alone already promise a satisfying crunch.
Pour the warm glaze over the dry mixture, using a sturdy spatula to coat every single piece. This is the moment of truth – you’ll see the glaze cling like a glossy veil, turning each bite a glossy amber.
Watch Out: If the glaze is too hot, it can melt the chocolate chips later; let it sit for 2‑3 minutes before mixing.Spread the coated mixture in an even layer on the prepared baking sheet. Make sure the pieces aren’t piled; a single layer guarantees uniform toasting. Slide the sheet into the oven and bake for 45 minutes, stirring every 15 minutes to prevent burning and to achieve that perfect golden‑brown hue. You’ll hear a faint crackle as the sugars caramelize, and the aroma will fill the kitchen like a warm hug.
After 45 minutes, remove the pan and let the mix cool for about 10 minutes. This pause is crucial; it allows the glaze to set, creating that satisfying snap when you bite. While it cools, I like to prep the final sweet additions.
Once the mix is lukewarm, sprinkle the chocolate chips, candy corn, and orange sprinkles over the top. Gently fold them in with a spatula so the chips stay whole and the candy retains its shape. The chocolate will soften just enough to become delightfully melty, while the candy corn stays crisp.
Transfer the finished mix to a large airtight container. Store at room temperature for up to a week, or refrigerate for longer freshness. The flavor deepens over time, so the next day it will taste even better – a true testament to the power of letting flavors marry.
Finally, serve the mix in a festive bowl, garnish with a few extra pumpkin seeds for visual flair, and watch your guests dive in with gusto. Picture yourself pulling this out of the oven, the whole kitchen smelling incredible, and the first bite delivering a perfect crunch‑to‑melt ratio. That’s the moment you’ll remember forever.
That's it — you did it. But hold on, I've got a few more tricks that'll take this to another level…
Insider Tricks for Flawless Results
The Temperature Rule Nobody Follows
Never bake at a temperature higher than 300°F for this mix. Higher heat causes the sugar to caramelize too quickly, resulting in burnt edges and a bitter aftertaste. By keeping the oven low and slow, you give the glaze time to seep into every crevice, creating a uniform coating that stays crisp for days. A friend once cranked the oven to 350°F and ended up with a batch that tasted like burnt toast – let’s just say the party was a flop.
Why Your Nose Knows Best
Trust the aroma as your ultimate timer. When the kitchen fills with a sweet‑spicy scent and you can almost taste the caramel on the back of your tongue, the mix is ready to be turned. If you rely solely on the clock, you risk over‑baking. Your nose is a built‑in sensor that tells you when the sugars have reached that perfect amber stage.
The 5‑Minute Rest That Changes Everything
After the mix comes out of the oven, let it sit undisturbed for exactly five minutes before stirring. This short rest allows the glaze to set, preventing the pieces from clumping together when you toss in the chocolate chips. Skipping this step leads to a soggy mess where the chips melt into a sticky puddle.
Pre‑Toasting Nuts for Extra Depth
Give your peanuts and almonds a quick toast in a dry skillet for two minutes before adding them to the bowl. The heat brings out their natural oils, adding a toasted richness that makes the overall flavor more complex. This is a game‑changer that elevates the snack from ordinary to gourmet.
Layering Sweet After Baking
Adding the candy corn, orange sprinkles, and chocolate chips after baking preserves their texture. If you bake them in, the candy corn becomes mushy and the sprinkles lose their color. By folding them in while the mix is still warm, you ensure they stay vibrant and provide that satisfying crunch‑to‑melt contrast.
Creative Twists and Variations
This recipe is a playground. Here are some of my favorite ways to switch things up:
Spicy Inferno
Swap the cinnamon for a teaspoon of smoked paprika and add a pinch of cayenne pepper to the glaze. The result is a smoky, fiery mix that pairs perfectly with a cold beer. Great for those who love a little heat with their sweet.
Maple Bacon Bliss
Replace honey with pure maple syrup and fold in crisp bacon bits after baking. The maple adds a deep, earthy sweetness, while the bacon contributes a salty crunch that makes this version irresistibly addictive.
Nut‑Free Delight
Omit the peanuts and almonds, and increase the pretzel volume by 1 cup. Add toasted pumpkin seeds and sunflower seeds for a nut‑free crunch. This version is perfect for allergy‑sensitive guests without sacrificing texture.
Chocolate Overload
Use dark chocolate chips instead of milk chocolate, and drizzle a thin layer of melted white chocolate over the finished mix. The contrast of bitter and sweet chocolate creates a luxurious mouthfeel that feels like a dessert.
Harvest Harvest
Incorporate dried cranberries and chopped dried apricots for a fruity twist. The tartness of the dried fruit balances the sweetness, giving the mix a sophisticated, autumn‑alpine vibe.
Vegan Velvet
Swap butter for coconut oil, use agave nectar instead of honey, and choose dairy‑free chocolate chips. The flavor profile remains rich, and the mix stays completely plant‑based.
Storing and Bringing It Back to Life
Fridge Storage
Transfer the cooled mix to an airtight container and store it in the refrigerator for up to two weeks. The cool environment keeps the chocolate chips from melting and preserves the crispness of the pretzels. Before serving, let the container sit at room temperature for 10 minutes to restore the perfect crunch.
Freezer Friendly
If you’ve made a massive batch, portion it into zip‑top freezer bags and freeze for up to three months. The glaze holds up beautifully, and the texture remains unchanged after thawing. To re‑crisp, spread the mix on a baking sheet and warm it in a 250°F oven for 5 minutes.
Best Reheating Method
When you’re ready to serve, preheat your oven to 300°F and spread the mix in a single layer. Warm for 8‑10 minutes, then add a tiny splash of water (about a tablespoon) and toss gently; the steam revives any lost crispness without making it soggy. This trick brings the mix back to life as if it were freshly baked.