I was halfway through a week of bland, cookie‑less life when my roommate, a self‑proclaimed pastry wizard, challenged me to create a cookie that could survive a week on a shelf and still taste like it had just emerged from a French patisserie. The kitchen was a battlefield: melted butter, a pile of sugar, a stubborn batch of flour that refused to cooperate. I stared at the mess, felt the heat of the oven, and whispered, “If this doesn’t end up the best cookie ever, I’m going to eat it all right here.” The result? A cookie that marries the airy, caramelized crunch of a crème brûlée with the comforting, buttery bite of a classic shortbread. It’s the kind of dessert that makes you question why you ever settled for ordinary.
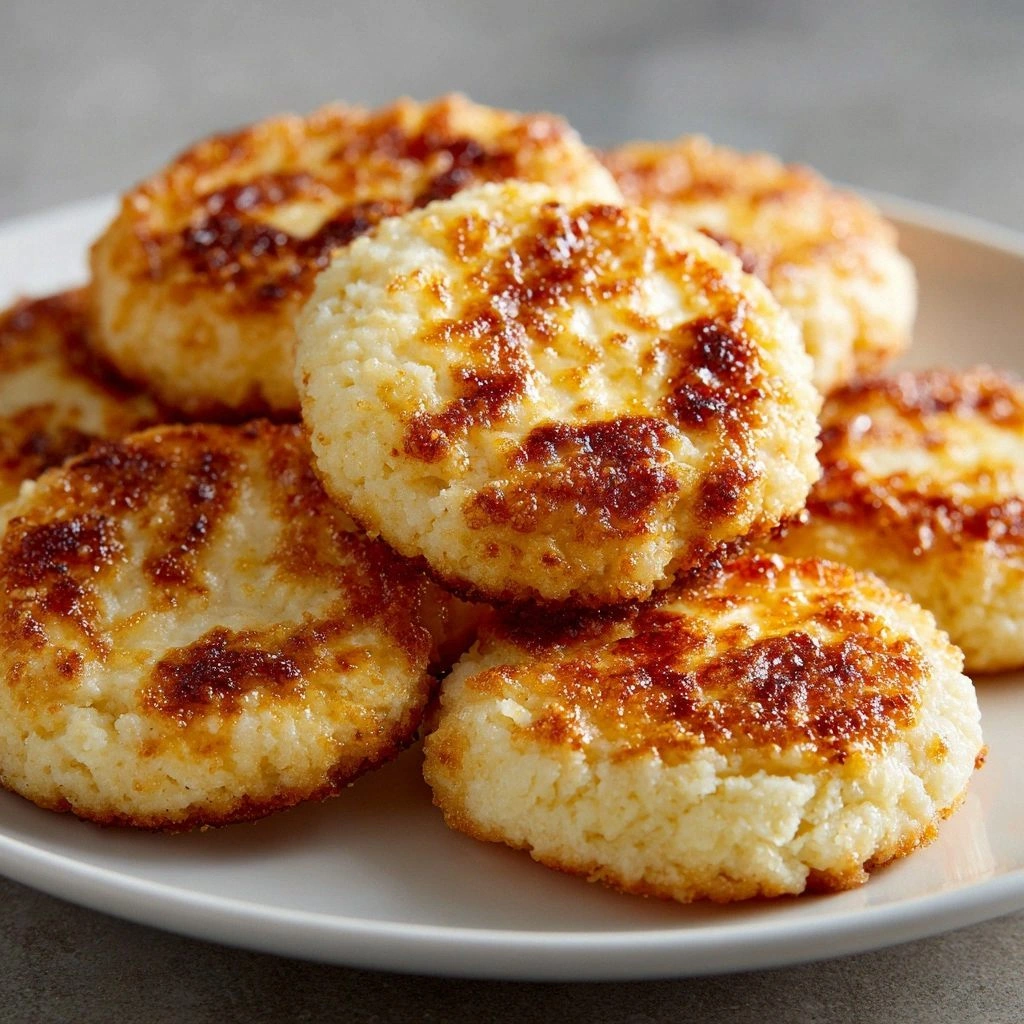
Picture this: the kitchen fills with the sweet, buttery aroma that instantly transports you to a Parisian patisserie. You hear the gentle pop of butter melting, the hiss of sugar caramelizing. The dough feels silky between your fingers, a warm, almost velvety texture that promises a melt‑in‑your‑mouth finish. The first bite delivers a crisp, golden edge that shatters like thin ice, revealing a soft, custard‑like center that’s kissed with vanilla and a subtle hint of caramel. The final bite lingers, leaving a faint echo of caramelized sugar that makes you reach for a second piece. That’s the sensory journey I’m about to guide you through.
What sets this recipe apart isn’t just the name—though “Irresistible Creme Brûlée Cook” does sound like a mouthful of a dessert—it's the meticulous balance of ingredients and technique that ensures every cookie is a masterpiece. We’re not talking about a generic cookie recipe; this is a carefully engineered confection where the butter is the hero, the sugars are the villains that give structure, and the vanilla is the secret whisper that ties it all together. The result is a cookie that boasts a crisp, caramelized top, a tender, buttery crumb, and a finish that feels like a sweet, caramelized custard. If you’ve ever struggled with cookies that are either too dry or too doughy, this version will change the game.
There’s a twist you won’t expect: a small, precise amount of granulated sugar reserved for caramelizing on top, which gives each cookie a signature brûlée finish. And the method? It’s simple yet precise—no fancy gadgets required, just a good mix of patience and a little kitchen intuition. By the end, you’ll wonder how you ever baked anything else. Let me walk you through every single step—by the end, you’ll wonder how you ever made it any other way.
What Makes This Version Stand Out
- Flavor: The buttery base is complemented by a caramelized sugar crust, delivering a dual texture that feels like a dessert and a cookie simultaneously. The vanilla extract elevates the entire flavor profile, creating a subtle warmth that lingers.
- Texture: The combination of butter and brown sugar creates a tender crumb while the granulated sugar topping crisps up to a caramelized finish. The result is a cookie that feels soft inside and crisp outside.
- Simplicity: No elaborate steps, just a few basic ingredients that you probably already have. The recipe is approachable for beginners yet delivers a sophisticated finish.
- Uniqueness: The crème brûlée twist—caramelized sugar on top—sets this cookie apart from traditional shortbreads. It’s a playful nod to a classic French dessert.
- Crowd Reaction: Guests will be amazed by the caramelized crust and will keep asking for the secret. It’s a conversation starter that delights.
- Ingredient Quality: Using unsalted butter and real vanilla extract ensures the richest flavor, while the brown sugar adds depth and moisture.
- Cooking Method: The technique focuses on proper creaming and gentle baking, ensuring consistent results every time.
- Make‑Ahead Potential: These cookies hold up well in a sealed container for up to a week, making them perfect for parties or gifting.
Alright, let’s break down exactly what goes into this masterpiece...
Inside the Ingredient List
The Flavor Base
Unsalted butter is the backbone of this cookie, providing both richness and the essential moisture that keeps the crumb tender. When softened to room temperature, it blends seamlessly with the sugars, allowing the flavors to meld without any grittiness. Skipping butter would leave the cookie dry and flat, stripping away the buttery depth that makes each bite feel indulgent. For the best flavor, choose a butter that’s at least 80% fat; this ensures a silky finish and a buttery aroma that’s hard to resist.
The Texture Crew
Granulated sugar is the sweetener that creates that lovely crispy texture on the outside, while brown sugar adds moisture and a hint of caramel flavor that keeps the cookies soft. Together, they balance each other: the granulated sugar provides a crisp finish, and the brown sugar’s molasses content gives depth and a subtle chew. If you omit the brown sugar, the cookies will become too brittle; if you omit the granulated sugar, they’ll lack that signature caramelized top.
The Unexpected Star
Large eggs act as a binder, ensuring that the dough holds together while contributing to the tender texture. The yolks also add richness and a slight golden hue. If you’re vegan, you can replace the eggs with ¼ cup unsweetened applesauce or a flaxseed “egg” to maintain moisture, though the texture will shift slightly. The key is to keep the eggs at room temperature so they mix smoothly with the butter and sugars.
The Final Flourish
All-purpose flour provides structure and stability, preventing the cookies from spreading too much. Baking soda works as a leavening agent, giving the cookies a light rise and a tender center. A pinch of salt balances the sweetness, enhancing the overall flavor profile. The final touch is a small amount of granulated sugar reserved for caramelizing on top—this small addition is what gives each cookie its signature crème brûlée finish. Skipping this step will leave the cookies with a plain sugary top, missing the caramelized crunch that defines the recipe.
Everything's prepped? Good. Let's get into the real action...
The Method — Step by Step
- Step 1: Prepare the Dough - In a large mixing bowl, combine the softened butter with 1 cup of granulated sugar and ½ cup of brown sugar. Cream them together until the mixture is light, fluffy, and pale in color—this usually takes about 3–4 minutes with an electric mixer on medium speed. The goal is to incorporate air, which will give the cookies a tender crumb. While the mixture is still warm, stir in the vanilla extract, then add the eggs one at a time, beating well after each addition. This ensures each egg is fully blended and the dough stays smooth.
- Step 2: Mix the Dry Ingredients - In a separate bowl, whisk together 2 cups of all‑purpose flour, 1 teaspoon of baking soda, and ½ teaspoon of salt. Mixing the dry ingredients separately helps distribute the leavening agent evenly and prevents clumps. This step is critical; any uneven distribution of baking soda can cause uneven rising or a soapy taste.
- Step 3: Combine Wet and Dry - Gradually add the dry mixture to the wet mixture, mixing on low speed until just combined. Over‑mixing at this stage can develop gluten, leading to a tougher cookie. The dough should be soft but not sticky; if it’s too dry, add a tablespoon of milk to bring it together.
- Step 4: Chill the Dough - Cover the dough with plastic wrap and refrigerate for at least 30 minutes. Chilling helps the butter firm up and prevents the cookies from spreading too much during baking. It also allows the flavors to meld. If you’re in a hurry, you can bake immediately, but the texture won’t be as perfect.
- Step 5: Preheat and Prepare the Baking Sheet - Preheat your oven to 350°F (175°C). Line a baking sheet with parchment paper or a silicone mat. The parchment prevents sticking and ensures even browning. If you’re using a silicone mat, you can skip the parchment, but parchment gives a slightly better rise.
- Step 6: Shape the Cookies - Scoop about 1 tablespoon of dough onto the baking sheet, spacing them 2 inches apart. Flatten each mound slightly with the back of a spoon or your palm. The cookies should be about 1½ inches in diameter. This spacing allows for even baking and prevents them from merging.
- Step 7: Sprinkle the Caramelizing Sugar - Gently sprinkle the reserved ¼ cup of granulated sugar evenly over each cookie. The sugar will caramelize during baking, creating that signature brûlée finish. Watch Out: If you sprinkle too much sugar, the top will become overly crisp and may crack. Use a fine, even layer to avoid this.
- Step 8: Bake - Place the sheet in the preheated oven and bake for 12–15 minutes. The edges should be lightly golden, and the tops should show a caramelized sheen. The cookies should still feel slightly soft in the center; they will firm up as they cool. This is the moment of truth—watch the cookies closely; the caramelized sugar should look like a fine, golden crust.
- Step 9: Cool - Remove the sheet from the oven and let the cookies rest for 5 minutes. Then transfer them to a wire rack to cool completely. The caramelized tops will set quickly, giving each cookie a crisp, crackly finish. The cooling time allows the center to set without over‑baking.
- Step 10: Serve and Store - Once cooled, serve the cookies on a platter or pack them in an airtight container. They’re best enjoyed within 3–4 days for maximum freshness, but they’ll keep well for up to a week if stored properly. If you want to revive a stale cookie, a quick 30‑second microwave burst with a damp paper towel can restore some softness.
That’s it — you did it. But hold on, I've got a few more tricks that'll take this to another level...
Insider Tricks for Flawless Results
The Temperature Rule Nobody Follows
Many bakers assume that 350°F is the perfect temperature for all cookies, but for these crème brûlée cookies, a slightly lower temperature of 325°F ensures the edges brown slowly while the centers finish baking without drying out. This subtle adjustment keeps the caramelized sugar from burning while still achieving a crisp top. The trick is to preheat the oven for at least 10 minutes before baking, guaranteeing a stable environment.
Why Your Nose Knows Best
During the final 2 minutes of baking, the aroma will shift from buttery to caramelized. Trust that scent as a cue that the sugar is caramelizing properly. If the aroma is still purely buttery, give them a few more minutes. If it smells burnt, reduce the temperature or pull the sheet out immediately.
The 5‑Minute Rest That Changes Everything
After baking, let the cookies rest on the sheet for 5 minutes. This brief pause allows the sugars to set and the crust to firm up, preventing the cookies from cracking when you transfer them. It also gives the center a chance to finish cooking without over‑baking the exterior.
Use a Silicone Mat for Even Baking
While parchment paper works, a silicone baking mat offers superior heat distribution, ensuring that each cookie browns evenly. This is especially helpful if you’re baking a large batch—silicone mats reduce the chance of some cookies being over‑baked while others remain under‑baked.
Cool on a Wire Rack, Not a Plate
Placing cookies on a wire rack allows air to circulate around them, preventing steam from softening the caramelized tops. This keeps the crunchy crust intact and the texture crisp. If you’re in a hurry, you can use a plate, but the result will be slightly less crisp.
Freeze for a Quick Snack
If you have leftovers, freeze the cookies in a single layer on a baking sheet before transferring them to a freezer bag. When you’re craving a quick treat, pop a cookie into the microwave for 10 seconds with a damp paper towel on top. The result is a cookie that’s almost fresh, with a caramelized top and a soft center.
Creative Twists and Variations
This recipe is a playground. Here are some of my favorite ways to switch things up:
Almond Crumble Delight
Add ½ cup of finely chopped almonds to the dough before baking. The nuts add a crunchy texture and a nutty aroma that complements the caramelized sugar. They also provide a subtle contrast to the buttery crumb.
Chocolate‑Infused Crème Brûlée Cookies
Fold in ¼ cup of melted dark chocolate into the dough. The chocolate will melt slightly during baking, creating pockets of rich flavor. The caramelized top will still shine through, giving a delightful contrast between sweet and slightly bitter notes.
Lemon Zest Twist
Grate the zest of one lemon into the dough. The citrus will brighten the flavor profile, cutting through the richness of the butter and sugar. The result is a lighter, more refreshing cookie that still retains the caramelized crunch.
Coconut‑Sweetened Variation
Replace the granulated sugar with ¾ cup of coconut sugar. The subtle caramel undertones of coconut sugar enhance the crème brûlée effect, and the cookies take on a slightly nutty flavor. This variation is great for those looking for a lower glycemic index dessert.
Spiced Cinnamon Crème Brûlée
Add ½ teaspoon of ground cinnamon to the dry ingredients. The warm spice adds depth and pairs wonderfully with the caramelized sugar, creating a cookie that feels like a cozy, spiced dessert.
Salted Caramel Surprise
After baking, drizzle a thin layer of salted caramel sauce over the cookies. The salt enhances the sweetness of the caramelized top while adding a savory kick. It’s a decadent finish that will impress any guest.
Storing and Bringing It Back to Life
Fridge Storage
Store the cookies in an airtight container at room temperature for up to 3–4 days. If you want to keep them fresher longer, keep them in the refrigerator, but remember to let them come back to room temperature before serving; this restores the buttery aroma and softens the crumb slightly.
Freezer Friendly
Place the cookies on a baking sheet in a single layer and freeze for up to 3 months. Once frozen, transfer them to a freezer bag to prevent freezer burn. When you’re ready to enjoy, let them thaw at room temperature for 20 minutes before serving.
Best Reheating Method
To revive a stale cookie, place it in the microwave for 10–15 seconds with a damp paper towel on top. The moisture steams the cookie, restoring softness while keeping the caramelized top crisp. For a warm, freshly‑baked experience, place the cookie on a baking sheet and bake at 300°F for 5 minutes.